分類
發燒車訊

Json模塊和Pickle模塊的使用

在對數據進行序列化和反序列化是常見的數據操作,Python提供了兩個模塊方便開發者實現數據的序列化操作,即 json 模塊和 pickle 模塊。這兩個模塊主要區別如下:

  • json 是一個文本序列化格式,而 pickle 是一個二進制序列化格式;
  • json 是我們可以直觀閱讀的,而 pickle 不可以;
  • json 是可互操作的,在 Python 系統之外廣泛使用,而 pickle 則是 Python 專用的;
  • 默認情況下,json 只能表示 Python 內置類型的子集,不能表示自定義的類;但 pickle 可以表示大量的 Python 數據類型。

Json 模塊

Json 是一種輕量級的數據交換格式,由於其具有傳輸數據量小、數據格式易解析等特點,它被廣泛應用於各系統之間的交互操作,作為一種數據格式傳遞數據。它包含多個常用函數,具體如下:

dumps()函數

dumps()函數可以將 Python 對象編碼成 Json 字符串。例如:

#字典轉成json字符串 加上ensure_ascii=False以後,可以識別中文, indent=4是間隔4個空格显示

import json         
d={'小明':{'sex':'男','addr':'上海','age':26},'小紅':{ 'sex':'女','addr':'上海', 'age':24},}
print(json.dumps(d,ensure_ascii=False,indent=4))

#執行結果:
{
    "小明": {
        "sex": "男",
        "addr": "上海",
        "age": 26
    },
    "小紅": {
        "sex": "女",
        "addr": "上海",
        "age": 24
    }
}

dump()函數

dump()函數可以將 Python對象編碼成 json 字符串,並自動寫入到文件中,不需要再單獨寫文件。例如:

#字典轉成json字符串,不需要寫文件,自動轉成的json字符串寫入到‘users.json’的文件中 
import json                                                                         
d={'小明':{'sex':'男','addr':'上海','age':26},'小紅':{ 'sex':'女','addr':'上海', 'age':24},}
#打開一個名字為‘users.json’的空文件
fw =open('users.json','w',encoding='utf-8')

json.dump(d,fw,ensure_ascii=False,indent=4)

loads()函數

loads()函數可以將 json 字符串轉換成 Python 的數據類型。例如:

#這是users.json文件中的內容
{
    "小明":{
        "sex":"男",
        "addr":"上海",
        "age":26
    },
    "小紅":{
        "sex":"女",
        "addr":"上海",
        "age":24
    }
}

#!/usr/bin/python3
#把json串變成python的數據類型   
import json  
#打開‘users.json’的json文件
f =open('users.json','r',encoding='utf-8')
#讀文件
res=f.read()
print(json.loads(res))

#執行結果:
{'小明': {'sex': '男', 'addr': '上海', 'age': 26}, '小紅': {'sex': '女', 'addr': '上海', 'age': 24}}

load()函數

load()loads()功能相似,load()函數可以將 json 字符串轉換成 Python 數據類型,不同的是前者的參數是一個文件對象,不需要再單獨讀此文件。例如:

#把json串變成python的數據類型:字典,傳一個文件對象,不需要再單獨讀文件 
import json   
#打開文件
f =open('users.json','r',encoding='utf-8') 
print(json.load(f))

#執行結果:
{'小明': {'sex': '男', 'addr': '上海', 'age': 26}, '小紅': {'sex': '女', 'addr': '上海', 'age': 24}}

Pickle 模塊

Pickle 模塊與 Json 模塊功能相似,也包含四個函數,即 dump()、dumps()、loads() 和 load(),它們的主要區別如下:

  • dumps 和 dump 的區別在於前者是將對象序列化,而後者是將對象序列化並保存到文件中。
  • loads 和 load 的區別在於前者是將序列化的字符串反序列化,而後者是將序列化的字符串從文件讀取並反序列化。

dumps()函數

dumps()函數可以將數據通過特殊的形式轉換為只有python語言認識的字符串,例如:

import pickle
# dumps功能
import pickle
data = ['A', 'B', 'C','D']  
print(pickle.dumps(data))

b'\x80\x03]q\x00(X\x01\x00\x00\x00Aq\x01X\x01\x00\x00\x00Bq\x02X\x01\x00\x00\x00Cq\x03X\x01\x00\x00\x00Dq\x04e.'

dump()函數

dump()函數可以將數據通過特殊的形式轉換為只有python語言認識的字符串,並寫入文件。例如:

# dump功能
with open('test.txt', 'wb') as f:
    pickle.dump(data, f)
print('寫入成功')

寫入成功

loads()函數

loads()函數可以將pickle數據轉換為python的數據結構。例如:

# loads功能
msg = pickle.loads(datastr)
print(msg)

['A', 'B', 'C', 'D']

load()函數

load()函數可以從數據文件中讀取數據,並轉換為python的數據結構。例如:

# load功能
with open('test.txt', 'rb') as f:
   data = pickle.load(f)
print(data)

['A', 'B', 'C', 'D']

本站聲明:網站內容來源於博客園,如有侵權,請聯繫我們,我們將及時處理【其他文章推薦】

※帶您來了解什麼是 USB CONNECTOR  ?

※自行創業 缺乏曝光? 下一步"網站設計"幫您第一時間規劃公司的門面形象

※如何讓商品強力曝光呢? 網頁設計公司幫您建置最吸引人的網站,提高曝光率!!

※綠能、環保無空污,成為電動車最新代名詞,目前市場使用率逐漸普及化

※廣告預算用在刀口上,網站設計公司幫您達到更多曝光效益

分類
發燒車訊

使用C#+FFmpeg+DirectX+dxva2硬件解碼播放h264流

本文門檻較高,因此行文看起來會亂一些,如果你看到某處能會心一笑請馬上聯繫我開始擺龍門陣
如果你跟隨這篇文章實現了播放器,那你會得到一個高效率,低cpu佔用(單路720p視頻解碼播放佔用1%左右cpu),且代碼和引用精簡(無其他託管和非託管的dll依賴,更無需安裝任何插件,你的程序完全綠色運行);並且如果硬解不可用,切換到軟件是自動過程

  首先需要準備好visual studio/msys2/ffmpeg源碼/dx9sdk。因為我們要自己編譯ffmpeg,並且是改動代碼后編譯,ffmpeg我們編譯時會裁剪。

  • ffmpeg源碼大家使用4.2.1,和我保持同步,這樣比較好對應,下載地址為
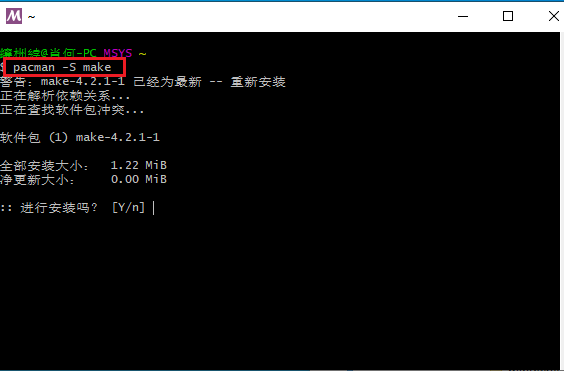
  • msys2安裝好后不需要裝mingw和其他東西,只需要安裝make(見下方圖片;我們編譯工具鏈會用msvc而非mingw-gcc)
  • visual studio版本按道理是不需要新版本的,應該是2008-2019都可以(不過還是得看看ffmpeg代碼里是否用了c99 c11等低版本不支持的東西),vs需要安裝c++和c#的模塊(見下方圖片;應該也不需要特意去打開什麼功能)
  • dx9的sdk理論上是不用安裝的(如果你是高手,可以用c#的ilgenerator直接寫calli;亦或者寫unsafe代碼直接進行內存call,文章最後我會為大家揭秘如何用c#調用c++甚至com組件)。我用了directx的managecode,由官方為我們做了dx的調用(見下方圖片)

  第二步是修改ffmpeg源碼並編譯,我們要修改的源碼只有一個文件的十餘行,而且是增量修改。

修改的文件位於libavutil/hwcontext_dxva2.c文件,我先將修改部分貼出來然後再給大家解釋

hwcontext_dxva2.c修改部分


static int dxva2_device_create9_extend(AVHWDeviceContext ctx, UINT adapter, HWND hWnd)
{
DXVA2DevicePriv
priv = ctx->user_opaque;
D3DPRESENT_PARAMETERS d3dpp = {0};
D3DDISPLAYMODE d3ddm;
HRESULT hr;
pDirect3DCreate9 createD3D = (pDirect3DCreate9 )dlsym(priv->d3dlib, "Direct3DCreate9");
if (!createD3D) {
av_log(ctx, AV_LOG_ERROR, "Failed to locate Direct3DCreate9\n");
return AVERROR_UNKNOWN;
}

priv->d3d9 = createD3D(D3D_SDK_VERSION);
if (!priv->d3d9) {
    av_log(ctx, AV_LOG_ERROR, "Failed to create IDirect3D object\n");
    return AVERROR_UNKNOWN;
}

IDirect3D9_GetAdapterDisplayMode(priv->d3d9, adapter, &d3ddm);

d3dpp.BackBufferFormat = d3ddm.Format;
d3dpp.Windowed = TRUE;           // 是否窗口显示   
d3dpp.hDeviceWindow = hWnd;    // 显示窗口句柄
d3dpp.SwapEffect = D3DSWAPEFFECT_DISCARD;    // 交換鏈設置,後台緩衝使用后直接丟棄
d3dpp.Flags = D3DPRESENTFLAG_VIDEO;          // 附加特性,显示視頻

DWORD behaviorFlags = D3DCREATE_MULTITHREADED | D3DCREATE_FPU_PRESERVE;
D3DDEVTYPE devType = D3DDEVTYPE_HAL;
D3DCAPS9 caps;

if (IDirect3D9_GetDeviceCaps(priv->d3d9, D3DADAPTER_DEFAULT, devType, &caps) >= 0)
{
    if (caps.DevCaps & D3DDEVCAPS_HWTRANSFORMANDLIGHT)
    {
        behaviorFlags |= D3DCREATE_HARDWARE_VERTEXPROCESSING;
    }
    else
    {
        behaviorFlags |= D3DCREATE_SOFTWARE_VERTEXPROCESSING;
    }
}

if(!hWnd)
    hWnd = GetDesktopWindow();
hr = IDirect3D9_CreateDevice(priv->d3d9, adapter, D3DDEVTYPE_HAL, hWnd,
                             behaviorFlags,
                             &d3dpp, &priv->d3d9device);
if (FAILED(hr)) {
    av_log(ctx, AV_LOG_ERROR, "Failed to create Direct3D device\n");
    return AVERROR_UNKNOWN;
}

return 0;

}

static int dxva2_device_create(AVHWDeviceContext ctx, const char device,
AVDictionary opts, int flags)
{
AVDXVA2DeviceContext
hwctx = ctx->hwctx;
DXVA2DevicePriv priv;
pCreateDeviceManager9
createDeviceManager = NULL;
unsigned resetToken = 0;
UINT adapter = D3DADAPTER_DEFAULT;
HRESULT hr;
int err;
AVDictionaryEntry *t = NULL;
HWND hWnd = NULL;

if (device)
    adapter = atoi(device);

priv = av_mallocz(sizeof(*priv));
if (!priv)
    return AVERROR(ENOMEM);

ctx->user_opaque = priv;
ctx->free        = dxva2_device_free;

priv->device_handle = INVALID_HANDLE_VALUE;

priv->d3dlib = dlopen("d3d9.dll", 0);
if (!priv->d3dlib) {
    av_log(ctx, AV_LOG_ERROR, "Failed to load D3D9 library\n");
    return AVERROR_UNKNOWN;
}
priv->dxva2lib = dlopen("dxva2.dll", 0);
if (!priv->dxva2lib) {
    av_log(ctx, AV_LOG_ERROR, "Failed to load DXVA2 library\n");
    return AVERROR_UNKNOWN;
}

createDeviceManager = (pCreateDeviceManager9 *)dlsym(priv->dxva2lib,
                                                     "DXVA2CreateDirect3DDeviceManager9");
if (!createDeviceManager) {
    av_log(ctx, AV_LOG_ERROR, "Failed to locate DXVA2CreateDirect3DDeviceManager9\n");
    return AVERROR_UNKNOWN;
}

t = av_dict_get(opts, "hWnd", NULL, 0);
if(t) {
    hWnd = (HWND)atoi(t->value);
}
if(hWnd) {
    if((err = dxva2_device_create9_extend(ctx, adapter, hWnd)) < 0)
        return err;
} else {
    if (dxva2_device_create9ex(ctx, adapter) < 0) {
        // Retry with "classic" d3d9
        err = dxva2_device_create9(ctx, adapter);
        if (err < 0)
            return err;
    }
}

hr = createDeviceManager(&resetToken, &hwctx->devmgr);
if (FAILED(hr)) {
    av_log(ctx, AV_LOG_ERROR, "Failed to create Direct3D device manager\n");
    return AVERROR_UNKNOWN;
}

hr = IDirect3DDeviceManager9_ResetDevice(hwctx->devmgr, priv->d3d9device, resetToken);
if (FAILED(hr)) {
    av_log(ctx, AV_LOG_ERROR, "Failed to bind Direct3D device to device manager\n");
    return AVERROR_UNKNOWN;
}

hr = IDirect3DDeviceManager9_OpenDeviceHandle(hwctx->devmgr, &priv->device_handle);
if (FAILED(hr)) {
    av_log(ctx, AV_LOG_ERROR, "Failed to open device handle\n");
    return AVERROR_UNKNOWN;
}

return 0;

}

  代碼中dxva2_device_create9_extend函數是我新加入的,並且在dxva2_device_create函數(這個函數是ffmpeg原始流程中的,我的改動不影響原本任何功能)中適時調用;簡單來說,原來的ffmpeg也能基於dxva2硬件解碼,但是它沒法將解碼得到的surface用於前台播放,因為它創建device時並未指定窗口和其他相關參數,大家可以參考我代碼實現,我將窗口句柄傳入后創建過程完全改變(其他人如果使用我們編譯的代碼,他沒有傳入窗口句柄,就執行原來的創建,因此百分百兼容)。

  (ps:在這裏我講一下網絡上另外一種寫法(兩年前我也用的他們的,因為沒時間詳細看ffmpeg源碼),他們是在外面創建的device和surface然後想辦法傳到ffmpeg內部進行替換,這樣做有好處,就是不用自己修改和編譯ffmpeg,壞處是得自己維護device和surface。至於二進制兼容方面考慮,兩種做法都不是太好)

代碼修改完成后我們使用msys2編譯

  • 首先是需要把編譯器設置為msvc,這個步驟通過使用vs的命令行工具即可,如下圖
  • 然後是設置msys2繼承環境變量(這樣make時才能找到cl/link)

  • 打開msys,查看變量是否正確
  • 編譯ffmpeg
./configure --enable-shared --enable-small --disable-all --disable-autodetect --enable-avcodec --enable-decoder=h264 --enable-dxva2 --enable-hwaccel=h264_dxva2 --toolchain=msvc --prefix=host
make && make install

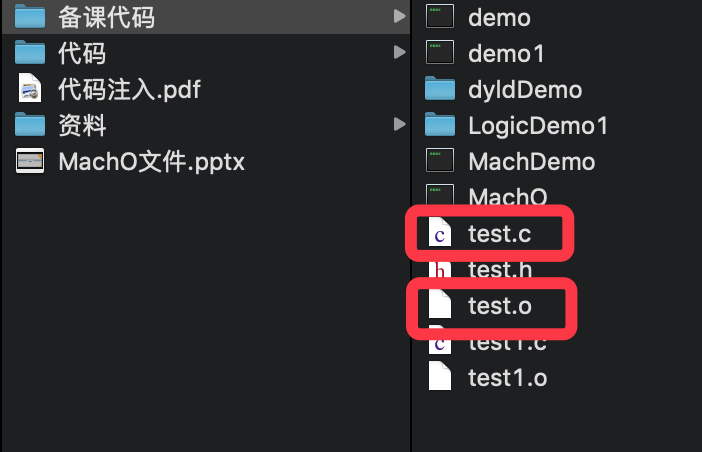
編譯完成後頭文件和dll在host文件夾內(編譯產出的dll也是clear的,不依賴msvc**.dll)

  在C#中使用我們產出的方式需要使用p/invoke和unsafe代碼。

我先貼出我針對ffmpeg寫的一個工具類,然後給大家稍微講解一下

FFHelper.cs


using System;
using System.Runtime.InteropServices;

namespace MultiPlayer
{
    public enum AVCodecID
    {
        AV_CODEC_ID_NONE,

        /* video codecs */
        AV_CODEC_ID_MPEG1VIDEO,
        AV_CODEC_ID_MPEG2VIDEO, ///< preferred ID for MPEG-1/2 video decoding
        AV_CODEC_ID_H261,
        AV_CODEC_ID_H263,
        AV_CODEC_ID_RV10,
        AV_CODEC_ID_RV20,
        AV_CODEC_ID_MJPEG,
        AV_CODEC_ID_MJPEGB,
        AV_CODEC_ID_LJPEG,
        AV_CODEC_ID_SP5X,
        AV_CODEC_ID_JPEGLS,
        AV_CODEC_ID_MPEG4,
        AV_CODEC_ID_RAWVIDEO,
        AV_CODEC_ID_MSMPEG4V1,
        AV_CODEC_ID_MSMPEG4V2,
        AV_CODEC_ID_MSMPEG4V3,
        AV_CODEC_ID_WMV1,
        AV_CODEC_ID_WMV2,
        AV_CODEC_ID_H263P,
        AV_CODEC_ID_H263I,
        AV_CODEC_ID_FLV1,
        AV_CODEC_ID_SVQ1,
        AV_CODEC_ID_SVQ3,
        AV_CODEC_ID_DVVIDEO,
        AV_CODEC_ID_HUFFYUV,
        AV_CODEC_ID_CYUV,
        AV_CODEC_ID_H264,
        AV_CODEC_ID_INDEO3,
        AV_CODEC_ID_VP3,
        AV_CODEC_ID_THEORA,
        AV_CODEC_ID_ASV1,
        AV_CODEC_ID_ASV2,
        AV_CODEC_ID_FFV1,
        AV_CODEC_ID_4XM,
        AV_CODEC_ID_VCR1,
        AV_CODEC_ID_CLJR,
        AV_CODEC_ID_MDEC,
        AV_CODEC_ID_ROQ,
        AV_CODEC_ID_INTERPLAY_VIDEO,
        AV_CODEC_ID_XAN_WC3,
        AV_CODEC_ID_XAN_WC4,
        AV_CODEC_ID_RPZA,
        AV_CODEC_ID_CINEPAK,
        AV_CODEC_ID_WS_VQA,
        AV_CODEC_ID_MSRLE,
        AV_CODEC_ID_MSVIDEO1,
        AV_CODEC_ID_IDCIN,
        AV_CODEC_ID_8BPS,
        AV_CODEC_ID_SMC,
        AV_CODEC_ID_FLIC,
        AV_CODEC_ID_TRUEMOTION1,
        AV_CODEC_ID_VMDVIDEO,
        AV_CODEC_ID_MSZH,
        AV_CODEC_ID_ZLIB,
        AV_CODEC_ID_QTRLE,
        AV_CODEC_ID_TSCC,
        AV_CODEC_ID_ULTI,
        AV_CODEC_ID_QDRAW,
        AV_CODEC_ID_VIXL,
        AV_CODEC_ID_QPEG,
        AV_CODEC_ID_PNG,
        AV_CODEC_ID_PPM,
        AV_CODEC_ID_PBM,
        AV_CODEC_ID_PGM,
        AV_CODEC_ID_PGMYUV,
        AV_CODEC_ID_PAM,
        AV_CODEC_ID_FFVHUFF,
        AV_CODEC_ID_RV30,
        AV_CODEC_ID_RV40,
        AV_CODEC_ID_VC1,
        AV_CODEC_ID_WMV3,
        AV_CODEC_ID_LOCO,
        AV_CODEC_ID_WNV1,
        AV_CODEC_ID_AASC,
        AV_CODEC_ID_INDEO2,
        AV_CODEC_ID_FRAPS,
        AV_CODEC_ID_TRUEMOTION2,
        AV_CODEC_ID_BMP,
        AV_CODEC_ID_CSCD,
        AV_CODEC_ID_MMVIDEO,
        AV_CODEC_ID_ZMBV,
        AV_CODEC_ID_AVS,
        AV_CODEC_ID_SMACKVIDEO,
        AV_CODEC_ID_NUV,
        AV_CODEC_ID_KMVC,
        AV_CODEC_ID_FLASHSV,
        AV_CODEC_ID_CAVS,
        AV_CODEC_ID_JPEG2000,
        AV_CODEC_ID_VMNC,
        AV_CODEC_ID_VP5,
        AV_CODEC_ID_VP6,
        AV_CODEC_ID_VP6F,
        AV_CODEC_ID_TARGA,
        AV_CODEC_ID_DSICINVIDEO,
        AV_CODEC_ID_TIERTEXSEQVIDEO,
        AV_CODEC_ID_TIFF,
        AV_CODEC_ID_GIF,
        AV_CODEC_ID_DXA,
        AV_CODEC_ID_DNXHD,
        AV_CODEC_ID_THP,
        AV_CODEC_ID_SGI,
        AV_CODEC_ID_C93,
        AV_CODEC_ID_BETHSOFTVID,
        AV_CODEC_ID_PTX,
        AV_CODEC_ID_TXD,
        AV_CODEC_ID_VP6A,
        AV_CODEC_ID_AMV,
        AV_CODEC_ID_VB,
        AV_CODEC_ID_PCX,
        AV_CODEC_ID_SUNRAST,
        AV_CODEC_ID_INDEO4,
        AV_CODEC_ID_INDEO5,
        AV_CODEC_ID_MIMIC,
        AV_CODEC_ID_RL2,
        AV_CODEC_ID_ESCAPE124,
        AV_CODEC_ID_DIRAC,
        AV_CODEC_ID_BFI,
        AV_CODEC_ID_CMV,
        AV_CODEC_ID_MOTIONPIXELS,
        AV_CODEC_ID_TGV,
        AV_CODEC_ID_TGQ,
        AV_CODEC_ID_TQI,
        AV_CODEC_ID_AURA,
        AV_CODEC_ID_AURA2,
        AV_CODEC_ID_V210X,
        AV_CODEC_ID_TMV,
        AV_CODEC_ID_V210,
        AV_CODEC_ID_DPX,
        AV_CODEC_ID_MAD,
        AV_CODEC_ID_FRWU,
        AV_CODEC_ID_FLASHSV2,
        AV_CODEC_ID_CDGRAPHICS,
        AV_CODEC_ID_R210,
        AV_CODEC_ID_ANM,
        AV_CODEC_ID_BINKVIDEO,
        AV_CODEC_ID_IFF_ILBM,
        //#define AV_CODEC_ID_IFF_BYTERUN1 AV_CODEC_ID_IFF_ILBM
        AV_CODEC_ID_KGV1,
        AV_CODEC_ID_YOP,
        AV_CODEC_ID_VP8,
        AV_CODEC_ID_PICTOR,
        AV_CODEC_ID_ANSI,
        AV_CODEC_ID_A64_MULTI,
        AV_CODEC_ID_A64_MULTI5,
        AV_CODEC_ID_R10K,
        AV_CODEC_ID_MXPEG,
        AV_CODEC_ID_LAGARITH,
        AV_CODEC_ID_PRORES,
        AV_CODEC_ID_JV,
        AV_CODEC_ID_DFA,
        AV_CODEC_ID_WMV3IMAGE,
        AV_CODEC_ID_VC1IMAGE,
        AV_CODEC_ID_UTVIDEO,
        AV_CODEC_ID_BMV_VIDEO,
        AV_CODEC_ID_VBLE,
        AV_CODEC_ID_DXTORY,
        AV_CODEC_ID_V410,
        AV_CODEC_ID_XWD,
        AV_CODEC_ID_CDXL,
        AV_CODEC_ID_XBM,
        AV_CODEC_ID_ZEROCODEC,
        AV_CODEC_ID_MSS1,
        AV_CODEC_ID_MSA1,
        AV_CODEC_ID_TSCC2,
        AV_CODEC_ID_MTS2,
        AV_CODEC_ID_CLLC,
        AV_CODEC_ID_MSS2,
        AV_CODEC_ID_VP9,
        AV_CODEC_ID_AIC,
        AV_CODEC_ID_ESCAPE130,
        AV_CODEC_ID_G2M,
        AV_CODEC_ID_WEBP,
        AV_CODEC_ID_HNM4_VIDEO,
        AV_CODEC_ID_HEVC,
        //#define AV_CODEC_ID_H265 AV_CODEC_ID_HEVC
        AV_CODEC_ID_FIC,
        AV_CODEC_ID_ALIAS_PIX,
        AV_CODEC_ID_BRENDER_PIX,
        AV_CODEC_ID_PAF_VIDEO,
        AV_CODEC_ID_EXR,
        AV_CODEC_ID_VP7,
        AV_CODEC_ID_SANM,
        AV_CODEC_ID_SGIRLE,
        AV_CODEC_ID_MVC1,
        AV_CODEC_ID_MVC2,
        AV_CODEC_ID_HQX,
        AV_CODEC_ID_TDSC,
        AV_CODEC_ID_HQ_HQA,
        AV_CODEC_ID_HAP,
        AV_CODEC_ID_DDS,
        AV_CODEC_ID_DXV,
        AV_CODEC_ID_SCREENPRESSO,
        AV_CODEC_ID_RSCC,
        AV_CODEC_ID_AVS2,

        AV_CODEC_ID_Y41P = 0x8000,
        AV_CODEC_ID_AVRP,
        AV_CODEC_ID_012V,
        AV_CODEC_ID_AVUI,
        AV_CODEC_ID_AYUV,
        AV_CODEC_ID_TARGA_Y216,
        AV_CODEC_ID_V308,
        AV_CODEC_ID_V408,
        AV_CODEC_ID_YUV4,
        AV_CODEC_ID_AVRN,
        AV_CODEC_ID_CPIA,
        AV_CODEC_ID_XFACE,
        AV_CODEC_ID_SNOW,
        AV_CODEC_ID_SMVJPEG,
        AV_CODEC_ID_APNG,
        AV_CODEC_ID_DAALA,
        AV_CODEC_ID_CFHD,
        AV_CODEC_ID_TRUEMOTION2RT,
        AV_CODEC_ID_M101,
        AV_CODEC_ID_MAGICYUV,
        AV_CODEC_ID_SHEERVIDEO,
        AV_CODEC_ID_YLC,
        AV_CODEC_ID_PSD,
        AV_CODEC_ID_PIXLET,
        AV_CODEC_ID_SPEEDHQ,
        AV_CODEC_ID_FMVC,
        AV_CODEC_ID_SCPR,
        AV_CODEC_ID_CLEARVIDEO,
        AV_CODEC_ID_XPM,
        AV_CODEC_ID_AV1,
        AV_CODEC_ID_BITPACKED,
        AV_CODEC_ID_MSCC,
        AV_CODEC_ID_SRGC,
        AV_CODEC_ID_SVG,
        AV_CODEC_ID_GDV,
        AV_CODEC_ID_FITS,
        AV_CODEC_ID_IMM4,
        AV_CODEC_ID_PROSUMER,
        AV_CODEC_ID_MWSC,
        AV_CODEC_ID_WCMV,
        AV_CODEC_ID_RASC,
        AV_CODEC_ID_HYMT,
        AV_CODEC_ID_ARBC,
        AV_CODEC_ID_AGM,
        AV_CODEC_ID_LSCR,
        AV_CODEC_ID_VP4,

        /* various PCM "codecs" */
        AV_CODEC_ID_FIRST_AUDIO = 0x10000,     ///< A dummy id pointing at the start of audio codecs
        AV_CODEC_ID_PCM_S16LE = 0x10000,
        AV_CODEC_ID_PCM_S16BE,
        AV_CODEC_ID_PCM_U16LE,
        AV_CODEC_ID_PCM_U16BE,
        AV_CODEC_ID_PCM_S8,
        AV_CODEC_ID_PCM_U8,
        AV_CODEC_ID_PCM_MULAW,
        AV_CODEC_ID_PCM_ALAW,
        AV_CODEC_ID_PCM_S32LE,
        AV_CODEC_ID_PCM_S32BE,
        AV_CODEC_ID_PCM_U32LE,
        AV_CODEC_ID_PCM_U32BE,
        AV_CODEC_ID_PCM_S24LE,
        AV_CODEC_ID_PCM_S24BE,
        AV_CODEC_ID_PCM_U24LE,
        AV_CODEC_ID_PCM_U24BE,
        AV_CODEC_ID_PCM_S24DAUD,
        AV_CODEC_ID_PCM_ZORK,
        AV_CODEC_ID_PCM_S16LE_PLANAR,
        AV_CODEC_ID_PCM_DVD,
        AV_CODEC_ID_PCM_F32BE,
        AV_CODEC_ID_PCM_F32LE,
        AV_CODEC_ID_PCM_F64BE,
        AV_CODEC_ID_PCM_F64LE,
        AV_CODEC_ID_PCM_BLURAY,
        AV_CODEC_ID_PCM_LXF,
        AV_CODEC_ID_S302M,
        AV_CODEC_ID_PCM_S8_PLANAR,
        AV_CODEC_ID_PCM_S24LE_PLANAR,
        AV_CODEC_ID_PCM_S32LE_PLANAR,
        AV_CODEC_ID_PCM_S16BE_PLANAR,

        AV_CODEC_ID_PCM_S64LE = 0x10800,
        AV_CODEC_ID_PCM_S64BE,
        AV_CODEC_ID_PCM_F16LE,
        AV_CODEC_ID_PCM_F24LE,
        AV_CODEC_ID_PCM_VIDC,

        /* various ADPCM codecs */
        AV_CODEC_ID_ADPCM_IMA_QT = 0x11000,
        AV_CODEC_ID_ADPCM_IMA_WAV,
        AV_CODEC_ID_ADPCM_IMA_DK3,
        AV_CODEC_ID_ADPCM_IMA_DK4,
        AV_CODEC_ID_ADPCM_IMA_WS,
        AV_CODEC_ID_ADPCM_IMA_SMJPEG,
        AV_CODEC_ID_ADPCM_MS,
        AV_CODEC_ID_ADPCM_4XM,
        AV_CODEC_ID_ADPCM_XA,
        AV_CODEC_ID_ADPCM_ADX,
        AV_CODEC_ID_ADPCM_EA,
        AV_CODEC_ID_ADPCM_G726,
        AV_CODEC_ID_ADPCM_CT,
        AV_CODEC_ID_ADPCM_SWF,
        AV_CODEC_ID_ADPCM_YAMAHA,
        AV_CODEC_ID_ADPCM_SBPRO_4,
        AV_CODEC_ID_ADPCM_SBPRO_3,
        AV_CODEC_ID_ADPCM_SBPRO_2,
        AV_CODEC_ID_ADPCM_THP,
        AV_CODEC_ID_ADPCM_IMA_AMV,
        AV_CODEC_ID_ADPCM_EA_R1,
        AV_CODEC_ID_ADPCM_EA_R3,
        AV_CODEC_ID_ADPCM_EA_R2,
        AV_CODEC_ID_ADPCM_IMA_EA_SEAD,
        AV_CODEC_ID_ADPCM_IMA_EA_EACS,
        AV_CODEC_ID_ADPCM_EA_XAS,
        AV_CODEC_ID_ADPCM_EA_MAXIS_XA,
        AV_CODEC_ID_ADPCM_IMA_ISS,
        AV_CODEC_ID_ADPCM_G722,
        AV_CODEC_ID_ADPCM_IMA_APC,
        AV_CODEC_ID_ADPCM_VIMA,

        AV_CODEC_ID_ADPCM_AFC = 0x11800,
        AV_CODEC_ID_ADPCM_IMA_OKI,
        AV_CODEC_ID_ADPCM_DTK,
        AV_CODEC_ID_ADPCM_IMA_RAD,
        AV_CODEC_ID_ADPCM_G726LE,
        AV_CODEC_ID_ADPCM_THP_LE,
        AV_CODEC_ID_ADPCM_PSX,
        AV_CODEC_ID_ADPCM_AICA,
        AV_CODEC_ID_ADPCM_IMA_DAT4,
        AV_CODEC_ID_ADPCM_MTAF,
        AV_CODEC_ID_ADPCM_AGM,

        /* AMR */
        AV_CODEC_ID_AMR_NB = 0x12000,
        AV_CODEC_ID_AMR_WB,

        /* RealAudio codecs*/
        AV_CODEC_ID_RA_144 = 0x13000,
        AV_CODEC_ID_RA_288,

        /* various DPCM codecs */
        AV_CODEC_ID_ROQ_DPCM = 0x14000,
        AV_CODEC_ID_INTERPLAY_DPCM,
        AV_CODEC_ID_XAN_DPCM,
        AV_CODEC_ID_SOL_DPCM,

        AV_CODEC_ID_SDX2_DPCM = 0x14800,
        AV_CODEC_ID_GREMLIN_DPCM,

        /* audio codecs */
        AV_CODEC_ID_MP2 = 0x15000,
        AV_CODEC_ID_MP3, ///< preferred ID for decoding MPEG audio layer 1, 2 or 3
        AV_CODEC_ID_AAC,
        AV_CODEC_ID_AC3,
        AV_CODEC_ID_DTS,
        AV_CODEC_ID_VORBIS,
        AV_CODEC_ID_DVAUDIO,
        AV_CODEC_ID_WMAV1,
        AV_CODEC_ID_WMAV2,
        AV_CODEC_ID_MACE3,
        AV_CODEC_ID_MACE6,
        AV_CODEC_ID_VMDAUDIO,
        AV_CODEC_ID_FLAC,
        AV_CODEC_ID_MP3ADU,
        AV_CODEC_ID_MP3ON4,
        AV_CODEC_ID_SHORTEN,
        AV_CODEC_ID_ALAC,
        AV_CODEC_ID_WESTWOOD_SND1,
        AV_CODEC_ID_GSM, ///< as in Berlin toast format
        AV_CODEC_ID_QDM2,
        AV_CODEC_ID_COOK,
        AV_CODEC_ID_TRUESPEECH,
        AV_CODEC_ID_TTA,
        AV_CODEC_ID_SMACKAUDIO,
        AV_CODEC_ID_QCELP,
        AV_CODEC_ID_WAVPACK,
        AV_CODEC_ID_DSICINAUDIO,
        AV_CODEC_ID_IMC,
        AV_CODEC_ID_MUSEPACK7,
        AV_CODEC_ID_MLP,
        AV_CODEC_ID_GSM_MS, /* as found in WAV */
        AV_CODEC_ID_ATRAC3,
        AV_CODEC_ID_APE,
        AV_CODEC_ID_NELLYMOSER,
        AV_CODEC_ID_MUSEPACK8,
        AV_CODEC_ID_SPEEX,
        AV_CODEC_ID_WMAVOICE,
        AV_CODEC_ID_WMAPRO,
        AV_CODEC_ID_WMALOSSLESS,
        AV_CODEC_ID_ATRAC3P,
        AV_CODEC_ID_EAC3,
        AV_CODEC_ID_SIPR,
        AV_CODEC_ID_MP1,
        AV_CODEC_ID_TWINVQ,
        AV_CODEC_ID_TRUEHD,
        AV_CODEC_ID_MP4ALS,
        AV_CODEC_ID_ATRAC1,
        AV_CODEC_ID_BINKAUDIO_RDFT,
        AV_CODEC_ID_BINKAUDIO_DCT,
        AV_CODEC_ID_AAC_LATM,
        AV_CODEC_ID_QDMC,
        AV_CODEC_ID_CELT,
        AV_CODEC_ID_G723_1,
        AV_CODEC_ID_G729,
        AV_CODEC_ID_8SVX_EXP,
        AV_CODEC_ID_8SVX_FIB,
        AV_CODEC_ID_BMV_AUDIO,
        AV_CODEC_ID_RALF,
        AV_CODEC_ID_IAC,
        AV_CODEC_ID_ILBC,
        AV_CODEC_ID_OPUS,
        AV_CODEC_ID_COMFORT_NOISE,
        AV_CODEC_ID_TAK,
        AV_CODEC_ID_METASOUND,
        AV_CODEC_ID_PAF_AUDIO,
        AV_CODEC_ID_ON2AVC,
        AV_CODEC_ID_DSS_SP,
        AV_CODEC_ID_CODEC2,

        AV_CODEC_ID_FFWAVESYNTH = 0x15800,
        AV_CODEC_ID_SONIC,
        AV_CODEC_ID_SONIC_LS,
        AV_CODEC_ID_EVRC,
        AV_CODEC_ID_SMV,
        AV_CODEC_ID_DSD_LSBF,
        AV_CODEC_ID_DSD_MSBF,
        AV_CODEC_ID_DSD_LSBF_PLANAR,
        AV_CODEC_ID_DSD_MSBF_PLANAR,
        AV_CODEC_ID_4GV,
        AV_CODEC_ID_INTERPLAY_ACM,
        AV_CODEC_ID_XMA1,
        AV_CODEC_ID_XMA2,
        AV_CODEC_ID_DST,
        AV_CODEC_ID_ATRAC3AL,
        AV_CODEC_ID_ATRAC3PAL,
        AV_CODEC_ID_DOLBY_E,
        AV_CODEC_ID_APTX,
        AV_CODEC_ID_APTX_HD,
        AV_CODEC_ID_SBC,
        AV_CODEC_ID_ATRAC9,
        AV_CODEC_ID_HCOM,

        /* subtitle codecs */
        AV_CODEC_ID_FIRST_SUBTITLE = 0x17000,          ///< A dummy ID pointing at the start of subtitle codecs.
        AV_CODEC_ID_DVD_SUBTITLE = 0x17000,
        AV_CODEC_ID_DVB_SUBTITLE,
        AV_CODEC_ID_TEXT,  ///< raw UTF-8 text
        AV_CODEC_ID_XSUB,
        AV_CODEC_ID_SSA,
        AV_CODEC_ID_MOV_TEXT,
        AV_CODEC_ID_HDMV_PGS_SUBTITLE,
        AV_CODEC_ID_DVB_TELETEXT,
        AV_CODEC_ID_SRT,

        AV_CODEC_ID_MICRODVD = 0x17800,
        AV_CODEC_ID_EIA_608,
        AV_CODEC_ID_JACOSUB,
        AV_CODEC_ID_SAMI,
        AV_CODEC_ID_REALTEXT,
        AV_CODEC_ID_STL,
        AV_CODEC_ID_SUBVIEWER1,
        AV_CODEC_ID_SUBVIEWER,
        AV_CODEC_ID_SUBRIP,
        AV_CODEC_ID_WEBVTT,
        AV_CODEC_ID_MPL2,
        AV_CODEC_ID_VPLAYER,
        AV_CODEC_ID_PJS,
        AV_CODEC_ID_ASS,
        AV_CODEC_ID_HDMV_TEXT_SUBTITLE,
        AV_CODEC_ID_TTML,
        AV_CODEC_ID_ARIB_CAPTION,

        /* other specific kind of codecs (generally used for attachments) */
        AV_CODEC_ID_FIRST_UNKNOWN = 0x18000,           ///< A dummy ID pointing at the start of various fake codecs.
        AV_CODEC_ID_TTF = 0x18000,

        AV_CODEC_ID_SCTE_35, ///< Contain timestamp estimated through PCR of program stream.
        AV_CODEC_ID_BINTEXT = 0x18800,
        AV_CODEC_ID_XBIN,
        AV_CODEC_ID_IDF,
        AV_CODEC_ID_OTF,
        AV_CODEC_ID_SMPTE_KLV,
        AV_CODEC_ID_DVD_NAV,
        AV_CODEC_ID_TIMED_ID3,
        AV_CODEC_ID_BIN_DATA,


        AV_CODEC_ID_PROBE = 0x19000, ///< codec_id is not known (like AV_CODEC_ID_NONE) but lavf should attempt to identify it

        AV_CODEC_ID_MPEG2TS = 0x20000, /**< _FAKE_ codec to indicate a raw MPEG-2 TS
                                * stream (only used by libavformat) */
        AV_CODEC_ID_MPEG4SYSTEMS = 0x20001, /**< _FAKE_ codec to indicate a MPEG-4 Systems
                                * stream (only used by libavformat) */
        AV_CODEC_ID_FFMETADATA = 0x21000,   ///< Dummy codec for streams containing only metadata information.
        AV_CODEC_ID_WRAPPED_AVFRAME = 0x21001, ///< Passthrough codec, AVFrames wrapped in AVPacket
    }

    public enum AVHWDeviceType
    {
        AV_HWDEVICE_TYPE_NONE,
        AV_HWDEVICE_TYPE_VDPAU,
        AV_HWDEVICE_TYPE_CUDA,
        AV_HWDEVICE_TYPE_VAAPI,
        AV_HWDEVICE_TYPE_DXVA2,
        AV_HWDEVICE_TYPE_QSV,
        AV_HWDEVICE_TYPE_VIDEOTOOLBOX,
        AV_HWDEVICE_TYPE_D3D11VA,
        AV_HWDEVICE_TYPE_DRM,
        AV_HWDEVICE_TYPE_OPENCL,
        AV_HWDEVICE_TYPE_MEDIACODEC,
    }

    public enum AVPixelFormat
    {
        AV_PIX_FMT_NONE = -1,
        AV_PIX_FMT_YUV420P,   ///< planar YUV 4:2:0, 12bpp, (1 Cr & Cb sample per 2x2 Y samples)
        AV_PIX_FMT_YUYV422,   ///< packed YUV 4:2:2, 16bpp, Y0 Cb Y1 Cr
        AV_PIX_FMT_RGB24,     ///< packed RGB 8:8:8, 24bpp, RGBRGB...
        AV_PIX_FMT_BGR24,     ///< packed RGB 8:8:8, 24bpp, BGRBGR...
        AV_PIX_FMT_YUV422P,   ///< planar YUV 4:2:2, 16bpp, (1 Cr & Cb sample per 2x1 Y samples)
        AV_PIX_FMT_YUV444P,   ///< planar YUV 4:4:4, 24bpp, (1 Cr & Cb sample per 1x1 Y samples)
        AV_PIX_FMT_YUV410P,   ///< planar YUV 4:1:0,  9bpp, (1 Cr & Cb sample per 4x4 Y samples)
        AV_PIX_FMT_YUV411P,   ///< planar YUV 4:1:1, 12bpp, (1 Cr & Cb sample per 4x1 Y samples)
        AV_PIX_FMT_GRAY8,     ///<        Y        ,  8bpp
        AV_PIX_FMT_MONOWHITE, ///<        Y        ,  1bpp, 0 is white, 1 is black, in each byte pixels are ordered from the msb to the lsb
        AV_PIX_FMT_MONOBLACK, ///<        Y        ,  1bpp, 0 is black, 1 is white, in each byte pixels are ordered from the msb to the lsb
        AV_PIX_FMT_PAL8,      ///< 8 bits with AV_PIX_FMT_RGB32 palette
        AV_PIX_FMT_YUVJ420P,  ///< planar YUV 4:2:0, 12bpp, full scale (JPEG), deprecated in favor of AV_PIX_FMT_YUV420P and setting color_range
        AV_PIX_FMT_YUVJ422P,  ///< planar YUV 4:2:2, 16bpp, full scale (JPEG), deprecated in favor of AV_PIX_FMT_YUV422P and setting color_range
        AV_PIX_FMT_YUVJ444P,  ///< planar YUV 4:4:4, 24bpp, full scale (JPEG), deprecated in favor of AV_PIX_FMT_YUV444P and setting color_range
        AV_PIX_FMT_UYVY422,   ///< packed YUV 4:2:2, 16bpp, Cb Y0 Cr Y1
        AV_PIX_FMT_UYYVYY411, ///< packed YUV 4:1:1, 12bpp, Cb Y0 Y1 Cr Y2 Y3
        AV_PIX_FMT_BGR8,      ///< packed RGB 3:3:2,  8bpp, (msb)2B 3G 3R(lsb)
        AV_PIX_FMT_BGR4,      ///< packed RGB 1:2:1 bitstream,  4bpp, (msb)1B 2G 1R(lsb), a byte contains two pixels, the first pixel in the byte is the one composed by the 4 msb bits
        AV_PIX_FMT_BGR4_BYTE, ///< packed RGB 1:2:1,  8bpp, (msb)1B 2G 1R(lsb)
        AV_PIX_FMT_RGB8,      ///< packed RGB 3:3:2,  8bpp, (msb)2R 3G 3B(lsb)
        AV_PIX_FMT_RGB4,      ///< packed RGB 1:2:1 bitstream,  4bpp, (msb)1R 2G 1B(lsb), a byte contains two pixels, the first pixel in the byte is the one composed by the 4 msb bits
        AV_PIX_FMT_RGB4_BYTE, ///< packed RGB 1:2:1,  8bpp, (msb)1R 2G 1B(lsb)
        AV_PIX_FMT_NV12,      ///< planar YUV 4:2:0, 12bpp, 1 plane for Y and 1 plane for the UV components, which are interleaved (first byte U and the following byte V)
        AV_PIX_FMT_NV21,      ///< as above, but U and V bytes are swapped

        AV_PIX_FMT_ARGB,      ///< packed ARGB 8:8:8:8, 32bpp, ARGBARGB...
        AV_PIX_FMT_RGBA,      ///< packed RGBA 8:8:8:8, 32bpp, RGBARGBA...
        AV_PIX_FMT_ABGR,      ///< packed ABGR 8:8:8:8, 32bpp, ABGRABGR...
        AV_PIX_FMT_BGRA,      ///< packed BGRA 8:8:8:8, 32bpp, BGRABGRA...

        AV_PIX_FMT_GRAY16BE,  ///<        Y        , 16bpp, big-endian
        AV_PIX_FMT_GRAY16LE,  ///<        Y        , 16bpp, little-endian
        AV_PIX_FMT_YUV440P,   ///< planar YUV 4:4:0 (1 Cr & Cb sample per 1x2 Y samples)
        AV_PIX_FMT_YUVJ440P,  ///< planar YUV 4:4:0 full scale (JPEG), deprecated in favor of AV_PIX_FMT_YUV440P and setting color_range
        AV_PIX_FMT_YUVA420P,  ///< planar YUV 4:2:0, 20bpp, (1 Cr & Cb sample per 2x2 Y & A samples)
        AV_PIX_FMT_RGB48BE,   ///< packed RGB 16:16:16, 48bpp, 16R, 16G, 16B, the 2-byte value for each R/G/B component is stored as big-endian
        AV_PIX_FMT_RGB48LE,   ///< packed RGB 16:16:16, 48bpp, 16R, 16G, 16B, the 2-byte value for each R/G/B component is stored as little-endian

        AV_PIX_FMT_RGB565BE,  ///< packed RGB 5:6:5, 16bpp, (msb)   5R 6G 5B(lsb), big-endian
        AV_PIX_FMT_RGB565LE,  ///< packed RGB 5:6:5, 16bpp, (msb)   5R 6G 5B(lsb), little-endian
        AV_PIX_FMT_RGB555BE,  ///< packed RGB 5:5:5, 16bpp, (msb)1X 5R 5G 5B(lsb), big-endian   , X=unused/undefined
        AV_PIX_FMT_RGB555LE,  ///< packed RGB 5:5:5, 16bpp, (msb)1X 5R 5G 5B(lsb), little-endian, X=unused/undefined

        AV_PIX_FMT_BGR565BE,  ///< packed BGR 5:6:5, 16bpp, (msb)   5B 6G 5R(lsb), big-endian
        AV_PIX_FMT_BGR565LE,  ///< packed BGR 5:6:5, 16bpp, (msb)   5B 6G 5R(lsb), little-endian
        AV_PIX_FMT_BGR555BE,  ///< packed BGR 5:5:5, 16bpp, (msb)1X 5B 5G 5R(lsb), big-endian   , X=unused/undefined
        AV_PIX_FMT_BGR555LE,  ///< packed BGR 5:5:5, 16bpp, (msb)1X 5B 5G 5R(lsb), little-endian, X=unused/undefined

        /** @name Deprecated pixel formats */
        /**@{*/
        AV_PIX_FMT_VAAPI_MOCO, ///< HW acceleration through VA API at motion compensation entry-point, Picture.data[3] contains a vaapi_render_state struct which contains macroblocks as well as various fields extracted from headers
        AV_PIX_FMT_VAAPI_IDCT, ///< HW acceleration through VA API at IDCT entry-point, Picture.data[3] contains a vaapi_render_state struct which contains fields extracted from headers
        AV_PIX_FMT_VAAPI_VLD,  ///< HW decoding through VA API, Picture.data[3] contains a VASurfaceID
        /**@}*/
        AV_PIX_FMT_VAAPI = AV_PIX_FMT_VAAPI_VLD,

        AV_PIX_FMT_YUV420P16LE,  ///< planar YUV 4:2:0, 24bpp, (1 Cr & Cb sample per 2x2 Y samples), little-endian
        AV_PIX_FMT_YUV420P16BE,  ///< planar YUV 4:2:0, 24bpp, (1 Cr & Cb sample per 2x2 Y samples), big-endian
        AV_PIX_FMT_YUV422P16LE,  ///< planar YUV 4:2:2, 32bpp, (1 Cr & Cb sample per 2x1 Y samples), little-endian
        AV_PIX_FMT_YUV422P16BE,  ///< planar YUV 4:2:2, 32bpp, (1 Cr & Cb sample per 2x1 Y samples), big-endian
        AV_PIX_FMT_YUV444P16LE,  ///< planar YUV 4:4:4, 48bpp, (1 Cr & Cb sample per 1x1 Y samples), little-endian
        AV_PIX_FMT_YUV444P16BE,  ///< planar YUV 4:4:4, 48bpp, (1 Cr & Cb sample per 1x1 Y samples), big-endian
        AV_PIX_FMT_DXVA2_VLD,    ///< HW decoding through DXVA2, Picture.data[3] contains a LPDIRECT3DSURFACE9 pointer

        AV_PIX_FMT_RGB444LE,  ///< packed RGB 4:4:4, 16bpp, (msb)4X 4R 4G 4B(lsb), little-endian, X=unused/undefined
        AV_PIX_FMT_RGB444BE,  ///< packed RGB 4:4:4, 16bpp, (msb)4X 4R 4G 4B(lsb), big-endian,    X=unused/undefined
        AV_PIX_FMT_BGR444LE,  ///< packed BGR 4:4:4, 16bpp, (msb)4X 4B 4G 4R(lsb), little-endian, X=unused/undefined
        AV_PIX_FMT_BGR444BE,  ///< packed BGR 4:4:4, 16bpp, (msb)4X 4B 4G 4R(lsb), big-endian,    X=unused/undefined
        AV_PIX_FMT_YA8,       ///< 8 bits gray, 8 bits alpha

        AV_PIX_FMT_Y400A = AV_PIX_FMT_YA8, ///< alias for AV_PIX_FMT_YA8
        AV_PIX_FMT_GRAY8A = AV_PIX_FMT_YA8, ///< alias for AV_PIX_FMT_YA8

        AV_PIX_FMT_BGR48BE,   ///< packed RGB 16:16:16, 48bpp, 16B, 16G, 16R, the 2-byte value for each R/G/B component is stored as big-endian
        AV_PIX_FMT_BGR48LE,   ///< packed RGB 16:16:16, 48bpp, 16B, 16G, 16R, the 2-byte value for each R/G/B component is stored as little-endian

        /**
         * The following 12 formats have the disadvantage of needing 1 format for each bit depth.
         * Notice that each 9/10 bits sample is stored in 16 bits with extra padding.
         * If you want to support multiple bit depths, then using AV_PIX_FMT_YUV420P16* with the bpp stored separately is better.
         */
        AV_PIX_FMT_YUV420P9BE, ///< planar YUV 4:2:0, 13.5bpp, (1 Cr & Cb sample per 2x2 Y samples), big-endian
        AV_PIX_FMT_YUV420P9LE, ///< planar YUV 4:2:0, 13.5bpp, (1 Cr & Cb sample per 2x2 Y samples), little-endian
        AV_PIX_FMT_YUV420P10BE,///< planar YUV 4:2:0, 15bpp, (1 Cr & Cb sample per 2x2 Y samples), big-endian
        AV_PIX_FMT_YUV420P10LE,///< planar YUV 4:2:0, 15bpp, (1 Cr & Cb sample per 2x2 Y samples), little-endian
        AV_PIX_FMT_YUV422P10BE,///< planar YUV 4:2:2, 20bpp, (1 Cr & Cb sample per 2x1 Y samples), big-endian
        AV_PIX_FMT_YUV422P10LE,///< planar YUV 4:2:2, 20bpp, (1 Cr & Cb sample per 2x1 Y samples), little-endian
        AV_PIX_FMT_YUV444P9BE, ///< planar YUV 4:4:4, 27bpp, (1 Cr & Cb sample per 1x1 Y samples), big-endian
        AV_PIX_FMT_YUV444P9LE, ///< planar YUV 4:4:4, 27bpp, (1 Cr & Cb sample per 1x1 Y samples), little-endian
        AV_PIX_FMT_YUV444P10BE,///< planar YUV 4:4:4, 30bpp, (1 Cr & Cb sample per 1x1 Y samples), big-endian
        AV_PIX_FMT_YUV444P10LE,///< planar YUV 4:4:4, 30bpp, (1 Cr & Cb sample per 1x1 Y samples), little-endian
        AV_PIX_FMT_YUV422P9BE, ///< planar YUV 4:2:2, 18bpp, (1 Cr & Cb sample per 2x1 Y samples), big-endian
        AV_PIX_FMT_YUV422P9LE, ///< planar YUV 4:2:2, 18bpp, (1 Cr & Cb sample per 2x1 Y samples), little-endian
        AV_PIX_FMT_GBRP,      ///< planar GBR 4:4:4 24bpp
        AV_PIX_FMT_GBR24P = AV_PIX_FMT_GBRP, // alias for #AV_PIX_FMT_GBRP
        AV_PIX_FMT_GBRP9BE,   ///< planar GBR 4:4:4 27bpp, big-endian
        AV_PIX_FMT_GBRP9LE,   ///< planar GBR 4:4:4 27bpp, little-endian
        AV_PIX_FMT_GBRP10BE,  ///< planar GBR 4:4:4 30bpp, big-endian
        AV_PIX_FMT_GBRP10LE,  ///< planar GBR 4:4:4 30bpp, little-endian
        AV_PIX_FMT_GBRP16BE,  ///< planar GBR 4:4:4 48bpp, big-endian
        AV_PIX_FMT_GBRP16LE,  ///< planar GBR 4:4:4 48bpp, little-endian
        AV_PIX_FMT_YUVA422P,  ///< planar YUV 4:2:2 24bpp, (1 Cr & Cb sample per 2x1 Y & A samples)
        AV_PIX_FMT_YUVA444P,  ///< planar YUV 4:4:4 32bpp, (1 Cr & Cb sample per 1x1 Y & A samples)
        AV_PIX_FMT_YUVA420P9BE,  ///< planar YUV 4:2:0 22.5bpp, (1 Cr & Cb sample per 2x2 Y & A samples), big-endian
        AV_PIX_FMT_YUVA420P9LE,  ///< planar YUV 4:2:0 22.5bpp, (1 Cr & Cb sample per 2x2 Y & A samples), little-endian
        AV_PIX_FMT_YUVA422P9BE,  ///< planar YUV 4:2:2 27bpp, (1 Cr & Cb sample per 2x1 Y & A samples), big-endian
        AV_PIX_FMT_YUVA422P9LE,  ///< planar YUV 4:2:2 27bpp, (1 Cr & Cb sample per 2x1 Y & A samples), little-endian
        AV_PIX_FMT_YUVA444P9BE,  ///< planar YUV 4:4:4 36bpp, (1 Cr & Cb sample per 1x1 Y & A samples), big-endian
        AV_PIX_FMT_YUVA444P9LE,  ///< planar YUV 4:4:4 36bpp, (1 Cr & Cb sample per 1x1 Y & A samples), little-endian
        AV_PIX_FMT_YUVA420P10BE, ///< planar YUV 4:2:0 25bpp, (1 Cr & Cb sample per 2x2 Y & A samples, big-endian)
        AV_PIX_FMT_YUVA420P10LE, ///< planar YUV 4:2:0 25bpp, (1 Cr & Cb sample per 2x2 Y & A samples, little-endian)
        AV_PIX_FMT_YUVA422P10BE, ///< planar YUV 4:2:2 30bpp, (1 Cr & Cb sample per 2x1 Y & A samples, big-endian)
        AV_PIX_FMT_YUVA422P10LE, ///< planar YUV 4:2:2 30bpp, (1 Cr & Cb sample per 2x1 Y & A samples, little-endian)
        AV_PIX_FMT_YUVA444P10BE, ///< planar YUV 4:4:4 40bpp, (1 Cr & Cb sample per 1x1 Y & A samples, big-endian)
        AV_PIX_FMT_YUVA444P10LE, ///< planar YUV 4:4:4 40bpp, (1 Cr & Cb sample per 1x1 Y & A samples, little-endian)
        AV_PIX_FMT_YUVA420P16BE, ///< planar YUV 4:2:0 40bpp, (1 Cr & Cb sample per 2x2 Y & A samples, big-endian)
        AV_PIX_FMT_YUVA420P16LE, ///< planar YUV 4:2:0 40bpp, (1 Cr & Cb sample per 2x2 Y & A samples, little-endian)
        AV_PIX_FMT_YUVA422P16BE, ///< planar YUV 4:2:2 48bpp, (1 Cr & Cb sample per 2x1 Y & A samples, big-endian)
        AV_PIX_FMT_YUVA422P16LE, ///< planar YUV 4:2:2 48bpp, (1 Cr & Cb sample per 2x1 Y & A samples, little-endian)
        AV_PIX_FMT_YUVA444P16BE, ///< planar YUV 4:4:4 64bpp, (1 Cr & Cb sample per 1x1 Y & A samples, big-endian)
        AV_PIX_FMT_YUVA444P16LE, ///< planar YUV 4:4:4 64bpp, (1 Cr & Cb sample per 1x1 Y & A samples, little-endian)

        AV_PIX_FMT_VDPAU,     ///< HW acceleration through VDPAU, Picture.data[3] contains a VdpVideoSurface

        AV_PIX_FMT_XYZ12LE,      ///< packed XYZ 4:4:4, 36 bpp, (msb) 12X, 12Y, 12Z (lsb), the 2-byte value for each X/Y/Z is stored as little-endian, the 4 lower bits are set to 0
        AV_PIX_FMT_XYZ12BE,      ///< packed XYZ 4:4:4, 36 bpp, (msb) 12X, 12Y, 12Z (lsb), the 2-byte value for each X/Y/Z is stored as big-endian, the 4 lower bits are set to 0
        AV_PIX_FMT_NV16,         ///< interleaved chroma YUV 4:2:2, 16bpp, (1 Cr & Cb sample per 2x1 Y samples)
        AV_PIX_FMT_NV20LE,       ///< interleaved chroma YUV 4:2:2, 20bpp, (1 Cr & Cb sample per 2x1 Y samples), little-endian
        AV_PIX_FMT_NV20BE,       ///< interleaved chroma YUV 4:2:2, 20bpp, (1 Cr & Cb sample per 2x1 Y samples), big-endian

        AV_PIX_FMT_RGBA64BE,     ///< packed RGBA 16:16:16:16, 64bpp, 16R, 16G, 16B, 16A, the 2-byte value for each R/G/B/A component is stored as big-endian
        AV_PIX_FMT_RGBA64LE,     ///< packed RGBA 16:16:16:16, 64bpp, 16R, 16G, 16B, 16A, the 2-byte value for each R/G/B/A component is stored as little-endian
        AV_PIX_FMT_BGRA64BE,     ///< packed RGBA 16:16:16:16, 64bpp, 16B, 16G, 16R, 16A, the 2-byte value for each R/G/B/A component is stored as big-endian
        AV_PIX_FMT_BGRA64LE,     ///< packed RGBA 16:16:16:16, 64bpp, 16B, 16G, 16R, 16A, the 2-byte value for each R/G/B/A component is stored as little-endian

        AV_PIX_FMT_YVYU422,   ///< packed YUV 4:2:2, 16bpp, Y0 Cr Y1 Cb

        AV_PIX_FMT_YA16BE,       ///< 16 bits gray, 16 bits alpha (big-endian)
        AV_PIX_FMT_YA16LE,       ///< 16 bits gray, 16 bits alpha (little-endian)

        AV_PIX_FMT_GBRAP,        ///< planar GBRA 4:4:4:4 32bpp
        AV_PIX_FMT_GBRAP16BE,    ///< planar GBRA 4:4:4:4 64bpp, big-endian
        AV_PIX_FMT_GBRAP16LE,    ///< planar GBRA 4:4:4:4 64bpp, little-endian
        /**
         *  HW acceleration through QSV, data[3] contains a pointer to the
         *  mfxFrameSurface1 structure.
         */
        AV_PIX_FMT_QSV,
        /**
         * HW acceleration though MMAL, data[3] contains a pointer to the
         * MMAL_BUFFER_HEADER_T structure.
         */
        AV_PIX_FMT_MMAL,

        AV_PIX_FMT_D3D11VA_VLD,  ///< HW decoding through Direct3D11 via old API, Picture.data[3] contains a ID3D11VideoDecoderOutputView pointer

        /**
         * HW acceleration through CUDA. data[i] contain CUdeviceptr pointers
         * exactly as for system memory frames.
         */
        AV_PIX_FMT_CUDA,

        AV_PIX_FMT_0RGB,        ///< packed RGB 8:8:8, 32bpp, XRGBXRGB...   X=unused/undefined
        AV_PIX_FMT_RGB0,        ///< packed RGB 8:8:8, 32bpp, RGBXRGBX...   X=unused/undefined
        AV_PIX_FMT_0BGR,        ///< packed BGR 8:8:8, 32bpp, XBGRXBGR...   X=unused/undefined
        AV_PIX_FMT_BGR0,        ///< packed BGR 8:8:8, 32bpp, BGRXBGRX...   X=unused/undefined

        AV_PIX_FMT_YUV420P12BE, ///< planar YUV 4:2:0,18bpp, (1 Cr & Cb sample per 2x2 Y samples), big-endian
        AV_PIX_FMT_YUV420P12LE, ///< planar YUV 4:2:0,18bpp, (1 Cr & Cb sample per 2x2 Y samples), little-endian
        AV_PIX_FMT_YUV420P14BE, ///< planar YUV 4:2:0,21bpp, (1 Cr & Cb sample per 2x2 Y samples), big-endian
        AV_PIX_FMT_YUV420P14LE, ///< planar YUV 4:2:0,21bpp, (1 Cr & Cb sample per 2x2 Y samples), little-endian
        AV_PIX_FMT_YUV422P12BE, ///< planar YUV 4:2:2,24bpp, (1 Cr & Cb sample per 2x1 Y samples), big-endian
        AV_PIX_FMT_YUV422P12LE, ///< planar YUV 4:2:2,24bpp, (1 Cr & Cb sample per 2x1 Y samples), little-endian
        AV_PIX_FMT_YUV422P14BE, ///< planar YUV 4:2:2,28bpp, (1 Cr & Cb sample per 2x1 Y samples), big-endian
        AV_PIX_FMT_YUV422P14LE, ///< planar YUV 4:2:2,28bpp, (1 Cr & Cb sample per 2x1 Y samples), little-endian
        AV_PIX_FMT_YUV444P12BE, ///< planar YUV 4:4:4,36bpp, (1 Cr & Cb sample per 1x1 Y samples), big-endian
        AV_PIX_FMT_YUV444P12LE, ///< planar YUV 4:4:4,36bpp, (1 Cr & Cb sample per 1x1 Y samples), little-endian
        AV_PIX_FMT_YUV444P14BE, ///< planar YUV 4:4:4,42bpp, (1 Cr & Cb sample per 1x1 Y samples), big-endian
        AV_PIX_FMT_YUV444P14LE, ///< planar YUV 4:4:4,42bpp, (1 Cr & Cb sample per 1x1 Y samples), little-endian
        AV_PIX_FMT_GBRP12BE,    ///< planar GBR 4:4:4 36bpp, big-endian
        AV_PIX_FMT_GBRP12LE,    ///< planar GBR 4:4:4 36bpp, little-endian
        AV_PIX_FMT_GBRP14BE,    ///< planar GBR 4:4:4 42bpp, big-endian
        AV_PIX_FMT_GBRP14LE,    ///< planar GBR 4:4:4 42bpp, little-endian
        AV_PIX_FMT_YUVJ411P,    ///< planar YUV 4:1:1, 12bpp, (1 Cr & Cb sample per 4x1 Y samples) full scale (JPEG), deprecated in favor of AV_PIX_FMT_YUV411P and setting color_range

        AV_PIX_FMT_BAYER_BGGR8,    ///< bayer, BGBG..(odd line), GRGR..(even line), 8-bit samples */
        AV_PIX_FMT_BAYER_RGGB8,    ///< bayer, RGRG..(odd line), GBGB..(even line), 8-bit samples */
        AV_PIX_FMT_BAYER_GBRG8,    ///< bayer, GBGB..(odd line), RGRG..(even line), 8-bit samples */
        AV_PIX_FMT_BAYER_GRBG8,    ///< bayer, GRGR..(odd line), BGBG..(even line), 8-bit samples */
        AV_PIX_FMT_BAYER_BGGR16LE, ///< bayer, BGBG..(odd line), GRGR..(even line), 16-bit samples, little-endian */
        AV_PIX_FMT_BAYER_BGGR16BE, ///< bayer, BGBG..(odd line), GRGR..(even line), 16-bit samples, big-endian */
        AV_PIX_FMT_BAYER_RGGB16LE, ///< bayer, RGRG..(odd line), GBGB..(even line), 16-bit samples, little-endian */
        AV_PIX_FMT_BAYER_RGGB16BE, ///< bayer, RGRG..(odd line), GBGB..(even line), 16-bit samples, big-endian */
        AV_PIX_FMT_BAYER_GBRG16LE, ///< bayer, GBGB..(odd line), RGRG..(even line), 16-bit samples, little-endian */
        AV_PIX_FMT_BAYER_GBRG16BE, ///< bayer, GBGB..(odd line), RGRG..(even line), 16-bit samples, big-endian */
        AV_PIX_FMT_BAYER_GRBG16LE, ///< bayer, GRGR..(odd line), BGBG..(even line), 16-bit samples, little-endian */
        AV_PIX_FMT_BAYER_GRBG16BE, ///< bayer, GRGR..(odd line), BGBG..(even line), 16-bit samples, big-endian */

        AV_PIX_FMT_XVMC,///< XVideo Motion Acceleration via common packet passing

        AV_PIX_FMT_YUV440P10LE, ///< planar YUV 4:4:0,20bpp, (1 Cr & Cb sample per 1x2 Y samples), little-endian
        AV_PIX_FMT_YUV440P10BE, ///< planar YUV 4:4:0,20bpp, (1 Cr & Cb sample per 1x2 Y samples), big-endian
        AV_PIX_FMT_YUV440P12LE, ///< planar YUV 4:4:0,24bpp, (1 Cr & Cb sample per 1x2 Y samples), little-endian
        AV_PIX_FMT_YUV440P12BE, ///< planar YUV 4:4:0,24bpp, (1 Cr & Cb sample per 1x2 Y samples), big-endian
        AV_PIX_FMT_AYUV64LE,    ///< packed AYUV 4:4:4,64bpp (1 Cr & Cb sample per 1x1 Y & A samples), little-endian
        AV_PIX_FMT_AYUV64BE,    ///< packed AYUV 4:4:4,64bpp (1 Cr & Cb sample per 1x1 Y & A samples), big-endian

        AV_PIX_FMT_VIDEOTOOLBOX, ///< hardware decoding through Videotoolbox

        AV_PIX_FMT_P010LE, ///< like NV12, with 10bpp per component, data in the high bits, zeros in the low bits, little-endian
        AV_PIX_FMT_P010BE, ///< like NV12, with 10bpp per component, data in the high bits, zeros in the low bits, big-endian

        AV_PIX_FMT_GBRAP12BE,  ///< planar GBR 4:4:4:4 48bpp, big-endian
        AV_PIX_FMT_GBRAP12LE,  ///< planar GBR 4:4:4:4 48bpp, little-endian

        AV_PIX_FMT_GBRAP10BE,  ///< planar GBR 4:4:4:4 40bpp, big-endian
        AV_PIX_FMT_GBRAP10LE,  ///< planar GBR 4:4:4:4 40bpp, little-endian

        AV_PIX_FMT_MEDIACODEC, ///< hardware decoding through MediaCodec

        AV_PIX_FMT_GRAY12BE,   ///<        Y        , 12bpp, big-endian
        AV_PIX_FMT_GRAY12LE,   ///<        Y        , 12bpp, little-endian
        AV_PIX_FMT_GRAY10BE,   ///<        Y        , 10bpp, big-endian
        AV_PIX_FMT_GRAY10LE,   ///<        Y        , 10bpp, little-endian

        AV_PIX_FMT_P016LE, ///< like NV12, with 16bpp per component, little-endian
        AV_PIX_FMT_P016BE, ///< like NV12, with 16bpp per component, big-endian

        /**
         * Hardware surfaces for Direct3D11.
         *
         * This is preferred over the legacy AV_PIX_FMT_D3D11VA_VLD. The new D3D11
         * hwaccel API and filtering support AV_PIX_FMT_D3D11 only.
         *
         * data[0] contains a ID3D11Texture2D pointer, and data[1] contains the
         * texture array index of the frame as intptr_t if the ID3D11Texture2D is
         * an array texture (or always 0 if it's a normal texture).
         */
        AV_PIX_FMT_D3D11,

        AV_PIX_FMT_GRAY9BE,   ///<        Y        , 9bpp, big-endian
        AV_PIX_FMT_GRAY9LE,   ///<        Y        , 9bpp, little-endian

        AV_PIX_FMT_GBRPF32BE,  ///< IEEE-754 single precision planar GBR 4:4:4,     96bpp, big-endian
        AV_PIX_FMT_GBRPF32LE,  ///< IEEE-754 single precision planar GBR 4:4:4,     96bpp, little-endian
        AV_PIX_FMT_GBRAPF32BE, ///< IEEE-754 single precision planar GBRA 4:4:4:4, 128bpp, big-endian
        AV_PIX_FMT_GBRAPF32LE, ///< IEEE-754 single precision planar GBRA 4:4:4:4, 128bpp, little-endian

        /**
         * DRM-managed buffers exposed through PRIME buffer sharing.
         *
         * data[0] points to an AVDRMFrameDescriptor.
         */
        AV_PIX_FMT_DRM_PRIME,
        /**
         * Hardware surfaces for OpenCL.
         *
         * data[i] contain 2D image objects (typed in C as cl_mem, used
         * in OpenCL as image2d_t) for each plane of the surface.
         */
        AV_PIX_FMT_OPENCL,

        AV_PIX_FMT_GRAY14BE,   ///<        Y        , 14bpp, big-endian
        AV_PIX_FMT_GRAY14LE,   ///<        Y        , 14bpp, little-endian

        AV_PIX_FMT_GRAYF32BE,  ///< IEEE-754 single precision Y, 32bpp, big-endian
        AV_PIX_FMT_GRAYF32LE,  ///< IEEE-754 single precision Y, 32bpp, little-endian

        AV_PIX_FMT_YUVA422P12BE, ///< planar YUV 4:2:2,24bpp, (1 Cr & Cb sample per 2x1 Y samples), 12b alpha, big-endian
        AV_PIX_FMT_YUVA422P12LE, ///< planar YUV 4:2:2,24bpp, (1 Cr & Cb sample per 2x1 Y samples), 12b alpha, little-endian
        AV_PIX_FMT_YUVA444P12BE, ///< planar YUV 4:4:4,36bpp, (1 Cr & Cb sample per 1x1 Y samples), 12b alpha, big-endian
        AV_PIX_FMT_YUVA444P12LE, ///< planar YUV 4:4:4,36bpp, (1 Cr & Cb sample per 1x1 Y samples), 12b alpha, little-endian

        AV_PIX_FMT_NV24,      ///< planar YUV 4:4:4, 24bpp, 1 plane for Y and 1 plane for the UV components, which are interleaved (first byte U and the following byte V)
        AV_PIX_FMT_NV42,      ///< as above, but U and V bytes are swapped

        AV_PIX_FMT_NB         ///< number of pixel formats, DO NOT USE THIS if you want to link with shared libav* because the number of formats might differ between versions
    }

    ///  /// ffmpeg中AVFrame結構體的前半部分,因為它太長了我不需要完全移植過來 /// 
    [StructLayout(LayoutKind.Sequential, Pack = 1, Size = 408)]
    public struct AVFrame
    {
        //#define AV_NUM_DATA_POINTERS 8
        //        uint8_t* data[AV_NUM_DATA_POINTERS];
        public IntPtr data1;// 一般是y分量
        public IntPtr data2;// 一般是v分量
        public IntPtr data3;// 一般是u分量
        public IntPtr data4;// 一般是surface(dxva2硬解時)
        public IntPtr data5;
        public IntPtr data6;
        public IntPtr data7;
        public IntPtr data8;
        public int linesize1;// y分量每行長度(stride)
        public int linesize2;// v分量每行長度(stride)
        public int linesize3;// u分量每行長度(stride)
        public int linesize4;
        public int linesize5;
        public int linesize6;
        public int linesize7;
        public int linesize8;
        //uint8_t **extended_data;
        IntPtr extended_data;
        public int width;
        public int height;
        public int nb_samples;
        public AVPixelFormat format;
    }

    [StructLayout(LayoutKind.Sequential, Pack = 1, Size = 128)]
    public struct AVCodec { }

    [StructLayout(LayoutKind.Sequential, Pack = 1, Size = 72)]
    public unsafe struct AVPacket
    {
        fixed byte frontUnused[24]; // 前部無關數據
        public void* data;
        public int size;
    }

    [StructLayout(LayoutKind.Sequential, Pack = 1, Size = 12)]
    public struct AVBufferRef { }

    [StructLayout(LayoutKind.Sequential, Pack = 1, Size = 904)]
    public unsafe struct AVCodecContext
    {
        fixed byte frontUnused[880]; // 前部無關數據
        public AVBufferRef* hw_frames_ctx;
    }

    [StructLayout(LayoutKind.Sequential)]
    public struct AVDictionary { }

    public unsafe static class FFHelper
    {
        const string avcodec = "avcodec-58";
        const string avutil = "avutil-56";
        const CallingConvention callingConvention = CallingConvention.Cdecl;

        [DllImport(avcodec, CallingConvention = callingConvention)]
        public extern static void avcodec_register_all();

        [DllImport(avcodec, CallingConvention = callingConvention)]
        public extern static AVCodec* avcodec_find_decoder(AVCodecID id);

        [DllImport(avcodec, CallingConvention = callingConvention)]
        public extern static AVPacket* av_packet_alloc();

        [DllImport(avcodec, CallingConvention = callingConvention)]
        public extern static void av_init_packet(AVPacket* pkt);

        //[DllImport(avcodec, CallingConvention = callingConvention)]
        //public extern static void av_packet_unref(AVPacket* pkt);

        [DllImport(avcodec, CallingConvention = callingConvention)]
        public extern static void av_packet_free(AVPacket** pkt);

        [DllImport(avcodec, CallingConvention = callingConvention)]
        public extern static AVCodecContext* avcodec_alloc_context3(AVCodec* codec);

        [DllImport(avcodec, CallingConvention = callingConvention)]
        public extern static int avcodec_open2(AVCodecContext* avctx, AVCodec* codec, AVDictionary** options);

        //[DllImport(avcodec, CallingConvention = callingConvention)]
        //public extern static int avcodec_decode_video2(IntPtr avctx, IntPtr picture, ref int got_picture_ptr, IntPtr avpkt);

        [DllImport(avcodec, CallingConvention = callingConvention)]
        public extern static void avcodec_free_context(AVCodecContext** avctx);

        [DllImport(avcodec, CallingConvention = callingConvention)]
        public extern static int avcodec_send_packet(AVCodecContext* avctx, AVPacket* pkt);

        [DllImport(avcodec, CallingConvention = callingConvention)]
        public extern static int avcodec_receive_frame(AVCodecContext* avctx, AVFrame* frame);


        [DllImport(avutil, CallingConvention = callingConvention)]
        public extern static int av_hwdevice_ctx_create(AVBufferRef** device_ctx, AVHWDeviceType type, string device, AVDictionary* opts, int flags);

        [DllImport(avutil, CallingConvention = callingConvention)]
        public extern static AVBufferRef* av_buffer_ref(AVBufferRef* buf);

        [DllImport(avutil, CallingConvention = callingConvention)]
        public extern static void av_buffer_unref(AVBufferRef** buf);

        [DllImport(avutil, CallingConvention = callingConvention)]
        public extern static AVFrame* av_frame_alloc();

        [DllImport(avutil, CallingConvention = callingConvention)]
        public extern static void av_frame_free(AVFrame** frame);

        [DllImport(avutil, CallingConvention = callingConvention)]
        public extern static void av_log_set_level(int level);

        [DllImport(avutil, CallingConvention = callingConvention)]
        public extern static int av_dict_set_int(AVDictionary** pm, string key, long value, int flags);

        [DllImport(avutil, CallingConvention = callingConvention)]
        public extern static void av_dict_free(AVDictionary** m);
    }
}

上文中主要有幾個地方是知識點,大家做c#的如果需要和底層交互可以了解一下

  • 結構體的使用
      結構體在c#與c/c++基本一致,都是內存連續變量的一種組合方式。與c/c++相同,在c#中,如果我們不知道(或者可以規避,因為結構體可能很複雜,很多無關字段)結構體細節只知道結構體整體大小時,我們可以用Pack=1,SizeConst=來表示一個大小已知的結構體。
  • 指針的使用
      c#中,有兩種存儲內存地址(指針)的方式,一是使用interop體系中的IntPtr類型(大家可以將其想象成void*),一是在不安全的上下文(unsafe)中使用結構體類型指針(此處不討論c++類指針)
  • unsafe和fixed使用
      簡單來說,有了unsafe你才能用指針;而有了fixed你才能確保指針指向位置不被GC壓縮。我們使用fixed達到的效果就是顯式跳過了結構體中前部無關數據(參考上文中AVCodecContext等結構體定義),後文中我們還會使用fixed。

  現在我們開始編寫解碼和播放部分(即我們的具體應用)代碼

FFPlayer.cs


using Microsoft.DirectX;
using Microsoft.DirectX.Direct3D;
using System;
using System.Drawing;
using System.Runtime.InteropServices;
using System.Text;
using System.Windows.Forms;
using static MultiPlayer.FFHelper;

namespace MultiPlayer
{
public unsafe partial class FFPlayer : UserControl
{
[DllImport("msvcrt", EntryPoint = "memcpy", CallingConvention = CallingConvention.Cdecl, SetLastError = false)]
static extern void memcpy(IntPtr dest, IntPtr src, int count); // 用於在解碼器和directx間拷貝內存的c函數

    private IntPtr contentPanelHandle;                              // 畫面渲染的控件句柄,因為畫面渲染時可能出於非UI線程,因此先保存句柄避免CLR報錯

    private int lastIWidth, lastIHeight;                            // 上次控件大小,用於在控件大小改變時做出判定重新初始化渲染上下文
    private Rectangle lastCBounds;                                  // 臨時變量,存儲上次控件區域(屏幕坐標)
    private Rectangle lastVRect;                                    // 臨時變量,存儲上次解碼出的圖像大小
    private Device device;                                          // 當使用軟解時,這個變量生效,它是IDirect3Device9*對象,用於繪製YUV
    private Surface surface;                                        // 當使用軟解時,這個變量生效,它是IDirect3Surface9*對象,用於接受解碼后的YUV數據
    AVPixelFormat lastFmt;                                          // 上次解碼出的圖像數據類型,這個理論上不會變

    AVCodec* codec;                                                 // ffmpeg的解碼器
    AVCodecContext* ctx;                                            // ffmpeg的解碼上下文
    AVBufferRef* hw_ctx;                                            // ffmpeg的解碼器硬件加速上下文,作為ctx的擴展存在
    AVPacket* avpkt;                                                // ffmpeg的數據包,用於封送待解碼數據
    IntPtr nalData;                                                 // 一塊預分配內存,作為avpkt中真正存儲數據的內存地址
    AVFrame* frame;                                                 // ffmpeg的已解碼幀,用於回傳解碼后的圖像

    private volatile bool _released = false;                        // 資源釋放標識,與鎖配合使用避免重複釋放資源(由於底層是c/c++,多線程下double free會導致程序崩潰)
    private object _codecLocker = new object();                     // 鎖,用於多線程下的互斥

    static FFPlayer()
    {
        avcodec_register_all();                                     // 靜態塊中註冊ffmpeg解碼器
    }

    public FFPlayer()
    {
        InitializeComponent();

        // 過程中,下列對象只需初始化一次
        frame = av_frame_alloc();
        avpkt = av_packet_alloc();
        av_init_packet(avpkt);
        nalData = Marshal.AllocHGlobal(1024 * 1024);
        codec = avcodec_find_decoder(AVCodecID.AV_CODEC_ID_H264);
        avpkt->data = (void*)nalData;
    }

    ~FFPlayer()
    {
        // 過程中,下列對象只需釋放一次
        if (null != frame)
            fixed (AVFrame** LPframe = &frame)
                av_frame_free(LPframe);
        if (null != avpkt)
            fixed (AVPacket** LPpkt = &avpkt)
                av_packet_free(LPpkt);
        if (default != nalData)
            Marshal.FreeHGlobal(nalData);
    }

    // 釋放資源
    // 此函數並非表示“終止”,更多的是表示“改變”和“重置”,實際上對此函數的調用更多的是發生在界面大小發生變化時和網絡掉包導致硬解異常時
    private void Releases()
    {
        // 過程中,下列對象會重複創建和銷毀多次
        lock (_codecLocker)
        {
            if (_released) return;
            if (null != ctx)
                fixed (AVCodecContext** LPctx = &ctx)
                    avcodec_free_context(LPctx);
            if (null != hw_ctx)
                fixed (AVBufferRef** LPhw_ctx = &hw_ctx)
                    av_buffer_unref(LPhw_ctx);
            // (PS:device和surface我們將其置為null,讓GC幫我們調用Finalize,它則會自行釋放資源)
            surface = null;
            device = null;
            lastFmt = AVPixelFormat.AV_PIX_FMT_NONE;
            _released = true;
        }
    }

    // Load事件中保存控件句柄
    private void FFPlayer_Load(object sender, EventArgs e)
    {
        contentPanelHandle = Handle; // 這個句柄也可以是你控件內真正要渲染畫面的句柄
        lastCBounds = ClientRectangle; // 同理,區域也不一定是自身显示區域
    }

    // 解碼函數,由外部調用,送一一個分片好的nal
    public void H264Received(byte[] nal)
    {
        lock (_codecLocker)
        {
            // 判斷界面大小更改了,先重置一波
            // (因為DirectX中界面大小改變是一件大事,沒得法繞過,只能推倒從來)
            // 如果你的显示控件不是當前控件本身,此處需要做修改
            if (!ClientRectangle.Equals(lastCBounds))
            {
                lastCBounds = ClientRectangle;
                Releases();
            }

            if (null == ctx)
            {
                // 第一次接收到待解碼數據時初始化一個解碼器上下文
                ctx = avcodec_alloc_context3(codec);
                if (null == ctx)
                {
                    return;
                }
                // 通過參數傳遞控件句柄給硬件加速上下文
                AVDictionary* dic;
                av_dict_set_int(&dic, "hWnd", contentPanelHandle.ToInt64(), 0);
                fixed (AVBufferRef** LPhw_ctx = &hw_ctx)
                {
                    if (av_hwdevice_ctx_create(LPhw_ctx, AVHWDeviceType.AV_HWDEVICE_TYPE_DXVA2,
                                                    null, dic, 0) >= 0)
                    {
                        ctx->hw_frames_ctx = av_buffer_ref(hw_ctx);
                    }
                }
                av_dict_free(&dic);
                ctx->hw_frames_ctx = av_buffer_ref(hw_ctx);
                if (avcodec_open2(ctx, codec, null) < 0)
                {
                    fixed (AVCodecContext** LPctx = &ctx)
                        avcodec_free_context(LPctx);
                    fixed (AVBufferRef** LPhw_ctx = &hw_ctx)
                        av_buffer_unref(LPhw_ctx);
                    return;
                }
            }
            _released = false;

            // 開始解碼
            Marshal.Copy(nal, 0, nalData, nal.Length);
            avpkt->size = nal.Length;
            if (avcodec_send_packet(ctx, avpkt) < 0)
            {
                Releases(); return; // 如果程序走到了這裏,一般是因為網絡掉包導致nal數據不連續,沒辦法, 推倒從來
            }
        receive_frame:
            int err = avcodec_receive_frame(ctx, frame);
            if (err == -11) return; // EAGAIN
            if (err < 0)
            {
                Releases(); return; // 同上,一般這裏很少出錯,但一旦發生,只能推倒從來
            }

            // 嘗試播放一幀畫面
            AVFrame s_frame = *frame;
            // 這裏由於我無論如何都要加速,而一般顯卡最兼容的是yv12格式,因此我只對dxva2和420p做了處理,如果你的h264解出來不是這些,我建議轉成rgb(那你就需要編譯和使用swscale模塊了)
            if (s_frame.format != AVPixelFormat.AV_PIX_FMT_DXVA2_VLD && s_frame.format != AVPixelFormat.AV_PIX_FMT_YUV420P && s_frame.format != AVPixelFormat.AV_PIX_FMT_YUVJ420P) return;
            try
            {
                int width = s_frame.width;
                int height = s_frame.height;
                if (lastIWidth != width || lastIHeight != height || lastFmt != s_frame.format) // 這個if判定的是第一次嘗試渲染,因為一般碼流的寬高和格式不會變
                {
                    if (s_frame.format != AVPixelFormat.AV_PIX_FMT_DXVA2_VLD)
                    {
                        // 假如硬解不成功(例如h264是baseline的,ffmpeg新版不支持baseline的dxva2硬解)
                        // 我們就嘗試用directx渲染yuv,至少省去yuv轉rgb,可以略微節省一丟丟cpu
                        PresentParameters pp = new PresentParameters();
                        pp.Windowed = true;
                        pp.SwapEffect = SwapEffect.Discard;
                        pp.BackBufferCount = 0;
                        pp.DeviceWindowHandle = contentPanelHandle;
                        pp.BackBufferFormat = Manager.Adapters.Default.CurrentDisplayMode.Format;
                        pp.EnableAutoDepthStencil = false;
                        pp.PresentFlag = PresentFlag.Video;
                        pp.FullScreenRefreshRateInHz = 0;//D3DPRESENT_RATE_DEFAULT
                        pp.PresentationInterval = 0;//D3DPRESENT_INTERVAL_DEFAULT
                        Caps caps = Manager.GetDeviceCaps(Manager.Adapters.Default.Adapter, DeviceType.Hardware);
                        CreateFlags behaviorFlas = CreateFlags.MultiThreaded | CreateFlags.FpuPreserve;
                        if (caps.DeviceCaps.SupportsHardwareTransformAndLight)
                        {
                            behaviorFlas |= CreateFlags.HardwareVertexProcessing;
                        }
                        else
                        {
                            behaviorFlas |= CreateFlags.SoftwareVertexProcessing;
                        }
                        device = new Device(Manager.Adapters.Default.Adapter, DeviceType.Hardware, contentPanelHandle, behaviorFlas, pp);
                        //(Format)842094158;//nv12
                        surface = device.CreateOffscreenPlainSurface(width, height, (Format)842094169, Pool.Default);//yv12,顯卡兼容性最好的格式
                    }
                    lastIWidth = width;
                    lastIHeight = height;
                    lastVRect = new Rectangle(0, 0, lastIWidth, lastIHeight);
                    lastFmt = s_frame.format;
                }
                if (lastFmt != AVPixelFormat.AV_PIX_FMT_DXVA2_VLD)
                {
                    // 如果硬解失敗,我們還需要把yuv拷貝到surface
                    //ffmpeg沒有yv12,只有i420,而一般顯卡又支持的是yv12,因此下文中uv分量是反向的
                    int stride;
                    var gs = surface.LockRectangle(LockFlags.DoNotWait, out stride);
                    if (gs == null) return;
                    for (int i = 0; i < lastIHeight; i++)
                    {
                        memcpy(gs.InternalData + i * stride, s_frame.data1 + i * s_frame.linesize1, lastIWidth);
                    }
                    for (int i = 0; i < lastIHeight / 2; i++)
                    {
                        memcpy(gs.InternalData + stride * lastIHeight + i * stride / 2, s_frame.data3 + i * s_frame.linesize3, lastIWidth / 2);
                    }
                    for (int i = 0; i < lastIHeight / 2; i++)
                    {
                        memcpy(gs.InternalData + stride * lastIHeight + stride * lastIHeight / 4 + i * stride / 2, s_frame.data2 + i * s_frame.linesize2, lastIWidth / 2);
                    }
                    surface.UnlockRectangle();
                }

                // 下面的代碼開始燒腦了,如果是dxva2硬解出來的圖像數據,則圖像數據本身就是一個surface,並且它就綁定了device
                // 因此我們可以直接用它,如果是x264軟解出來的yuv,則我們需要用上文創建的device和surface搞事情
                Surface _surface = lastFmt == AVPixelFormat.AV_PIX_FMT_DXVA2_VLD ? new Surface(s_frame.data4) : surface;
                if (lastFmt == AVPixelFormat.AV_PIX_FMT_DXVA2_VLD)
                    GC.SuppressFinalize(_surface);// 這一句代碼是點睛之筆,如果不加,程序一會兒就崩潰了,熟悉GC和DX的童鞋估計一下就能看出門道;整篇代碼,就這句折騰了我好幾天,其他都好說
                Device _device = lastFmt == AVPixelFormat.AV_PIX_FMT_DXVA2_VLD ? _surface.Device : device;
                _device.Clear(ClearFlags.Target, Color.Black, 1, 0);
                _device.BeginScene();
                Surface backBuffer = _device.GetBackBuffer(0, 0, BackBufferType.Mono);
                _device.StretchRectangle(_surface, lastVRect, backBuffer, lastCBounds, TextureFilter.Linear);
                _device.EndScene();
                _device.Present();
                backBuffer.Dispose();
            }
            catch (DirectXException ex)
            {
                StringBuilder msg = new StringBuilder();
                msg.Append("*************************************** \n");
                msg.AppendFormat(" 異常發生時間: {0} \n", DateTime.Now);
                msg.AppendFormat(" 導致當前異常的 Exception 實例: {0} \n", ex.InnerException);
                msg.AppendFormat(" 導致異常的應用程序或對象的名稱: {0} \n", ex.Source);
                msg.AppendFormat(" 引發異常的方法: {0} \n", ex.TargetSite);
                msg.AppendFormat(" 異常堆棧信息: {0} \n", ex.StackTrace);
                msg.AppendFormat(" 異常消息: {0} \n", ex.Message);
                msg.Append("***************************************");
                Console.WriteLine(msg);
                Releases();
                return;
            }
            goto receive_frame; // 嘗試解出第二幅畫面(實際上不行,因為我們約定了單次傳入nal是一個,當然,代碼是可以改的)
        }
    }
    
    // 外部調用停止解碼以显示釋放資源
    public void Stop()
    {
        Releases();
    }
}

}

下面講解代碼最主要的三個部分

  • 初始化ffmpeg
      主要在靜態塊和構造函數中,過程中我沒有將AVPacket和AVFrame局部化,很多網上的代碼包括官方代碼都是局部化這兩個對象。我對此持保留意見(等我程序報錯了再說)
  • 將收到的數據送入ffmpeg解碼並將拿到的數據進行展示
      這裏值得一提的是get_format,官方有一個示例,下圖

它有一個get_format過程(詳見215行和63行),我沒有採用。這裏給大家解釋一下原因:

這個get_format的作用是ffmpeg給你提供了多個解碼器讓你來選一個,而且它內部有一個機制,如果你第一次選的解碼器不生效(初始化錯誤等),它會調用get_format第二次(第三次。。。)讓你再選一個,而我們首先認定了要用dxva2的硬件解碼器,其次,如果dxva2初始化錯誤,ffmpeg內部會自動降級為內置264軟解,因此我們無需多此一舉。

  • 發現解碼和播放過程中出現異常的解決辦法
    • 不支持硬解
      代碼中已經做出了一部分兼容,因為baseline的判定必須解出sps/pps才能知道,因此這個錯誤可能會延遲爆出(不過不用擔心,如果此時報錯,ffmpeg會自動降級為軟解)
    • 窗體大小改變
      基於DirectX中設備後台緩衝的寬高無法動態重設,我們只能在控件大小改變時推倒重來。如若不然,你繪製的畫面會進行意向不到的縮放
    • 網絡掉包導致硬件解碼器錯誤
      見代碼
    • 其他directx底層異常
      代碼中我加了一個try-catch,捕獲的異常類型是DirectXException,在c/c++中,我們一般是調用完函數後會得到一個HRESULT,並通過FAILED宏判定他,而這個步驟在c#自動幫我們做了,取而代之的是一個throw DirectXException過程,我們通過try-catch進行可能的異常處理(實際上還是推倒重來)

  番外篇:C#對DiretX調用的封裝
上文中我們使用DirectX的方式看起來即非COM組件,又非C-DLL的P/Invoke,難道DirectX真有託管代碼?
答案是否定的,C#的dll當然也是調用系統的d3d9.dll。不過我們有必要一探究竟,因為這裏面有一個隱藏副本

首先請大家準備好ildasm和visual studio,我們打開visual studio,創建一個c++工程(類型隨意),然後新建一個cpp文件,然後填入下面的代碼

如果你能執行,你會發現輸出是136(0x88);然後我們使用ildasm找到StrechRectangle的代碼

你會發現也有一個+0x88的過程,那麼其實道理就很容易懂了,c#通過calli(CLR指令)可以執行內存call,而得益於微軟com組件的函數表偏移量約定,我們可以通過頭文件知道函數對於對象指針的偏移(其實就是一個簡單的ThisCall)。具體細節大家查閱d3d9.h和calli的網絡文章即可。

本站聲明:網站內容來源於博客園,如有侵權,請聯繫我們,我們將及時處理【其他文章推薦】

網頁設計公司推薦更多不同的設計風格,搶佔消費者視覺第一線

※廣告預算用在刀口上,網站設計公司幫您達到更多曝光效益

※自行創業 缺乏曝光? 下一步"網站設計"幫您第一時間規劃公司的門面形象

分類
發燒車訊

加州拚減排、擬給予電動車30億美元購車退稅補助

華爾街日報15日報導,加州下議院已通過規模達30億美元的電動車購車退稅折扣法案,後續還得過上議院與州長Jerry Brown這兩關。負責起草這項法案的舊金山民主黨籍議員Phil Ting表示,加州若想落實氣候變遷目標(2025年讓150萬輛零排放車輛上路)、勢必得想辦法給電動車產業打強心針才行。根據加州空氣資源局的統計,加州已有超過25萬輛零排放汽車(包括電動車)上路、佔美國約半數的比重。根據加州新車經銷商協會發表的報告,2017年第1季電動車僅佔加州整體汽車銷售比重的2.7%。

Edmunds(汽車銷售追蹤網站)汽車業分析師Jessica Caldwell指出,加州若推新補貼方案、對銷售應該有所幫助,特別是Chevrolet Bolt、特斯拉Model 3(見圖)擁有更好的續航力。加州自2010年起給予每台全電動車2,500美元的折抵稅額、但自今年夏季起只有所得水準符合標準的消費者才能取得補助。

Thomson Reuters 7月16日引述法國週報《Le Journal du Dimanche(JDD)》報導,法國總統馬克宏(Emmanuel Macron)在受訪時表示,他對於美國總統川普(Donald Trump)改變退出巴黎氣候協議的決定抱持希望。馬克宏說,川普在兩人碰面時表示他會試著在未來數個月內找到解決方案。

Cobalt 27 Capital Corp(TSX-V:KBLT)6月23日在加拿大創業板初次公開發行(IPO)、一舉募得2.0億加幣(相當於1.507億美元)。瑞銀(UBS)表示,鋰電池供應鏈中的原物料將受電動車滲透率快速增長的衝擊、但當中僅有鈷面臨儲備有限的問題。

通用汽車(General Motors)Chevrolet Bolt電動車續航力達238英里(383公里)、建議零售價37,495美元起(註:最多可取得7,500美元的聯邦折抵稅額、扣除後入手價相當於29,995美元)。

美聯社報導,IHS Markit汽車業分析師Stephanie Brinley指出,Bolt續航力遠高於美國平均來回通勤距離(40英里),但有時人們回家後可能忘了或沒有足夠時間進行充電,這是電動車主得多加費心的地方。

電動車大廠特斯拉(Tesla)14日上漲1.35%、收327.78美元;週線上漲4.65%、3週以來首度收高。

通用汽車14日上漲1.37%、收36.35美元,創3月16日以來收盤新高。

Cobalt 27 IPO價格為9.0加幣;7月14日大漲7.00%、以10.70加幣坐收,創IPO以來收盤新高。

(本文內容由授權使用。圖片出處:public domain CC0)

本站聲明:網站內容來源於EnergyTrend https://www.energytrend.com.tw/ev/,如有侵權,請聯繫我們,我們將及時處理

【其他文章推薦】

網頁設計公司推薦更多不同的設計風格,搶佔消費者視覺第一線

※廣告預算用在刀口上,網站設計公司幫您達到更多曝光效益

※自行創業 缺乏曝光? 下一步"網站設計"幫您第一時間規劃公司的門面形象

分類
發燒車訊

Gogoro 雲嘉地區電池交換站正式啟用,暢騎基隆到屏東

Gogoro 車主們期待已久的雲嘉地區電池交換站21 日正式開通提供服務。未來,Gogoro 的車主將可以騎乘Smartscooter 智慧雙輪縱貫台灣西半部,一路從基隆暢騎到屏東。

Gogoro 於21 日宣布,雲林嘉義地區首批5 座GoStation 電池交換站正式上線,其中兩站位於雲林斗六、虎尾;另三站則分布於嘉義市區。自從Gogoro 於2015 年在台北市設立首座電池交換站以來,短短兩年的時間,已經建置將近400 座電池交換站,廣布於基隆到屏東的各個縣市,在六都甚至不到一公里就設有一站,累積提供將近500 萬次的電池交換服務,是全世界最穩定的電池交換能源網路系統。

Gogoro 台灣區行銷總監陳彥揚表示: 「雲嘉地區GoStation 電池交換站的開通有3 個劃時代的意義。首先,我們顛覆消費者對於電動機車續航力不足的刻板印象;兩年前,沒有人會相信,我們可以騎乘電動機車橫跨北高。其次,對Gogoro 車主而言,Gogoro 將不再僅是都會的通勤工具,而是更進一步深入他們的生活,成為跨縣市旅遊的另一種交通選擇;最後,我們則提供雲嘉地區民眾一個能夠改善當地空污,讓生活環境更環保、更健康的解決方案。」

日前宣布Gogoro 2 系列預購超過13,000 台,震撼市場的Gogoro 在雲林嘉義地區提供電池交換站的服務後,搭配雲嘉地區相對較高的電動機車補助,將加速當地居民的購車意願。目前,雲林縣汰換二行程機車購買電動機車的總補助金額達34,000 元,嘉義市為31,000 元,嘉義縣則為21,000 元。Gogoro 也正規劃在不久的將來於雲嘉地區增設銷售及維修據點,希望很快可以讓雲嘉的居民享有Gogoro 完整的銷售、維修、電池交換等全方位服務。

  (合作媒體:。圖片出處:科技新報)

本站聲明:網站內容來源於EnergyTrend https://www.energytrend.com.tw/ev/,如有侵權,請聯繫我們,我們將及時處理

【其他文章推薦】

※帶您來了解什麼是 USB CONNECTOR  ?

※自行創業 缺乏曝光? 下一步"網站設計"幫您第一時間規劃公司的門面形象

※如何讓商品強力曝光呢? 網頁設計公司幫您建置最吸引人的網站,提高曝光率!!

※綠能、環保無空污,成為電動車最新代名詞,目前市場使用率逐漸普及化

※廣告預算用在刀口上,網站設計公司幫您達到更多曝光效益

分類
發燒車訊

上海新能源汽車展8月23舉行 新能源物流車運營模式受關注

資料顯示,目前中國物流車的保有量在2000萬量左右,而新能源物流車在整個物流市場僅占2%。隨著建設“美麗中國”的宏願及“十三五規劃”的國策推進,物流車輛的新能源化勢在必行。目前,中國物流行業發展迅速,除了中國郵政、順豐及四通一達等快遞企業;天貓、京東等電商自建物流之外,供應鏈企業、飲料食品、餐飲配送、食蔬鮮農、工廠貨運等行業無不存在物流。


千億市場規模放量


市場普遍認為,僅考慮替代市場,城市物流車市場空間可達250萬輛。2017年以來,物流車的訂單也是不斷。3月,欣旺達與陝西通家簽訂了20000輛電動物流車的動力電池系統訂單。5月,九龍汽車與廣通汽車簽訂《採購合同》,採購金額達26.55億元。6月,中植汽車與浙江軍盛控股有限公司、城市合夥人創客(南京)股份有限公司簽訂5年10萬輛純電動物流車的超大生產協議。7月,萬馬股份發佈最新投資者關係活動記錄表披露,公司圍繞“運力”重點佈局電動物流車、充電樁、貨源和快充網四個方面。上市公司頻獲訂單和加速佈局的背後無一不在說明,新能源物流車行業的發展將呈井噴態勢。


市場放量巨大但運營卻遇瓶頸


雖然市場放量巨大,政府剛需迫切,但是新能源物流車與傳統物流車同樣存在著購車成本高、運營模式單一、盈利難等問題。同時新能源物流車基本為純電動,充電難也成為了新能源物流車的推廣中亟待解決的問題。

目前,新能源物流車運營的模式大致分為四種:1.新能源物流車輛中長期租賃模式;2.新能源物流車輛分時租賃模式;廠商自有物流車定向租賃模式;4.新能源專用車輛定制模式。但是無論哪種模式來看,新能源物流車目前普遍面臨著充維保障體系建設週期長、投資大、需要土地、電網等需政府部門協調的諸多問題。


現有困難如何突破?


業內人士認為,大規模、體系化的運營,才能真正取得客戶的深度信任,讓客戶切實感受到物流車電動化時代的到來。如果純電動物流車運營仍然沿襲傳統物流車的老模式,必將會面臨諸多的發展瓶頸。只有改革新能源物流車的商業模式與運營模式,才能從根本上解決充電難、購車成本高、維保成本高、運營效率低等一系列問題。

據瞭解,由充電設施線上網、廣東省充電設施協會、廣東省新能源汽車產業協會和振威展覽股份共同主辦,中國土木工程學會城市公共交通學會協辦的2017上海國際新能源汽車產業博覽會將於8月23-25日在上海新國際博覽中心舉行。同期還將舉辦純電動物流車運營商大會、新能源汽車充換電技術高峰論壇及共用汽車大會。

其中,純電動物流車運營商大會邀請了八匹馬、一微新能源、駒馬物流、雲杉智慧、地上鐵、傳化智聯、士繼達新能源、綠道新能源等國內知名新能源物流車運營商,以及來自政府主管部門、專家學者、科研院校、資本方等重量級嘉賓參會交流,多維度深層次探討新能源物流車運營模式,旨在推動新能源物流車產業的快速發展。

此外,比亞迪、申龍客車、珠海銀隆、上汽集團、上饒客車、中植新能源、中通、江淮、吉利、眾泰、知豆、南京金龍、成功汽車、新吉奧集團、瑞馳新能源、福汽新龍馬等新能源汽車企業,以及精進電動、英威騰、東風電機、力神、沃特瑪、國軒高科、地上鐵、特來電、科陸、巴斯巴、萬馬專纜、奧美格、瑞可達等核心三電及零部件知名企業將亮相本次展會,展出最新款產品和前沿技術。


參觀預登記,請點擊:

本站聲明:網站內容來源於EnergyTrend https://www.energytrend.com.tw/ev/,如有侵權,請聯繫我們,我們將及時處理

【其他文章推薦】

網頁設計公司推薦更多不同的設計風格,搶佔消費者視覺第一線

※廣告預算用在刀口上,網站設計公司幫您達到更多曝光效益

※自行創業 缺乏曝光? 下一步"網站設計"幫您第一時間規劃公司的門面形象

分類
發燒車訊

MachO文件詳解–逆向開發

今天是逆向開發的第5天內容–MachO文件(Mac 和 iOS 平台可執行的文件),在逆向開發中是比較重要的,下面我們着重講解一下MachO文件的基本內容和使用。

一、MachO概述

1. 概述

Mach-O是Mach Object文件格式的縮寫,iOS以及Mac上可執行的文件格式,類似Window的exe格式,Linux上的elf格式。Mach-O是一個可執行文件、動態庫以及目標代碼的文件格式,是a.out格式的替代,提供了更高更強的擴展性。

2.常見格式

Mach-O常見格式如下:

  • 目標文件 .o
  • 庫文件
  1. .a
  2. .dylib
  3. .framework
  • 可執行文件
  • dyld
  • .dsym

  通過file文件路徑查看文件類型

我們通過部分實例代碼來簡單研究一下。

2.1目標文件.o

通過test.c 文件,可以使用clang命令將其編譯成目標文件.o

我們再通過file命令(如下)查看文件類型

是個Mach-O文件。

2.2 dylib

通過cd /usr/lib命令查看dylib

通過file命令查看文件類型


 2.3 .dsym

下面是一個截圖來說明.dsym是也是Mach-O文件格式


以上只是Mach-O常見格式的某一種,大家可以通過命令來嘗試。

3. 通用二進制文件

希望大家在了解App二進制架構的時候,可以先讀一下本人的另一篇博客關於armv7,armv7s以及arm64等的介紹。

通用二進制文件是蘋果自身發明的,基本內容如下

下面通過指令查看Macho文件來看下通用二進制文件


然後通過file指令查看文件類型


上面該MachO文件包含了3個架構分別是arm v7,arm v7s 以及arm 64 。

針對該MachO文件我們做幾個操作,利用lipo命令拆分合併架構

3.1 利用lipo-info查看MachO文件架構

3.2 瘦身MachO文件,拆分

利用lipo-thin瘦身架構


 查看一下結果如下,多出來一個新建的MachO_armv7


3.3 增加架構,合併

利用lipo -create 合併多種架構

發現多出一種框架,合併成功多出Demo可執行文件。結果如下:


整理出lipo命令如下:


二、MachO文件

2.1 文件結構

下面是蘋果官方圖解釋MachO文件結構圖

MachO文件的組成結構如上,看包括了三個部分

  • Header包含了該二進制文件的一般信息,信息如下:
  1. 字節順序、加載指令的數量以及架構類型
  2. 快速的確定一些信息,比如當前文件是32位或者64位,對應的文件類型和處理器是什麼
  • Load commands 包含很多內容的表
  1. 包括區域的位置、動態符號表以及符號表等
  • Data一般是對象文件的最大部分
  1. 一般包含Segement具體數據

2.2 Header的數據結構

在項目代碼中,按下Command+ 空格,然後輸入loader.h  

然後查看loader.h文件,找到mach_header

上面是mach_header,對應結構體的意義如下:

通過MachOView查看Mach64 Header頭部信息

2.3 LoadCommands

LoadCommand包含了很多內容的表,通過MachOView查看LoadCommand的信息,圖如下:


但是大家看的可能並不了解內容,下面有圖進行註解,可以看下主要的意思

2.4 Data

Data包含Segement,存儲具體數據,通過MachOView查看,地址映射內容


三、DYLD

3.1 dyld概述

dyld(the dynamic link editor)是蘋果動態鏈接器,是蘋果系統一個重要的組成部分,系統內核做好準備工作之後,剩下的就會交給了dyld。

3.2 dyld加載過程

程序的入口一般都是在main函數中,但是比較少的人關心main()函數之前發生了什麼?這次我們先探索dyld的加載過程。(但是比在main函數之前,load方法就在main函數之前)

3.2.1 新建項目,在main函數下斷


main()之前有個libdyld.dylib start入口,但是不是我們想要的,根據dyld源碼找到__dyld_start函數

3.2.2 dyld main()函數

dyld main()函數是關鍵函數,下面是函數實現內容。(此時的main實現函數和程序App的main 函數是不一樣的,因為dyld也是一個可執行文件,也是具有main函數的

//
// Entry point for dyld.  The kernel loads dyld and jumps to __dyld_start which
// sets up some registers and call this function.
//
// Returns address of main() in target program which __dyld_start jumps to
//
uintptr_t
_main(const macho_header* mainExecutableMH, uintptr_t mainExecutableSlide, 
        int argc, const char* argv[], const char* envp[], const char* apple[], 
        uintptr_t* startGlue)
{
    // Grab the cdHash of the main executable from the environment
    // 第一步,設置運行環境
    uint8_t mainExecutableCDHashBuffer[20];
    const uint8_t* mainExecutableCDHash = nullptr;
    if ( hexToBytes(_simple_getenv(apple, "executable_cdhash"), 40, mainExecutableCDHashBuffer) )
        // 獲取主程序的hash
        mainExecutableCDHash = mainExecutableCDHashBuffer;

    // Trace dyld's load
    notifyKernelAboutImage((macho_header*)&__dso_handle, _simple_getenv(apple, "dyld_file"));
#if !TARGET_IPHONE_SIMULATOR
    // Trace the main executable's load
    notifyKernelAboutImage(mainExecutableMH, _simple_getenv(apple, "executable_file"));
#endif

    uintptr_t result = 0;
    // 獲取主程序的macho_header結構
    sMainExecutableMachHeader = mainExecutableMH;
    // 獲取主程序的slide值
    sMainExecutableSlide = mainExecutableSlide;

    CRSetCrashLogMessage("dyld: launch started");
    // 設置上下文信息
    setContext(mainExecutableMH, argc, argv, envp, apple);

    // Pickup the pointer to the exec path.
    // 獲取主程序路徑
    sExecPath = _simple_getenv(apple, "executable_path");

    // <rdar://problem/13868260> Remove interim apple[0] transition code from dyld
    if (!sExecPath) sExecPath = apple[0];

    if ( sExecPath[0] != '/' ) {
        // have relative path, use cwd to make absolute
        char cwdbuff[MAXPATHLEN];
        if ( getcwd(cwdbuff, MAXPATHLEN) != NULL ) {
            // maybe use static buffer to avoid calling malloc so early...
            char* s = new char[strlen(cwdbuff) + strlen(sExecPath) + 2];
            strcpy(s, cwdbuff);
            strcat(s, "/");
            strcat(s, sExecPath);
            sExecPath = s;
        }
    }

    // Remember short name of process for later logging
    // 獲取進程名稱
    sExecShortName = ::strrchr(sExecPath, '/');
    if ( sExecShortName != NULL )
        ++sExecShortName;
    else
        sExecShortName = sExecPath;
    
    // 配置進程受限模式
    configureProcessRestrictions(mainExecutableMH);


    // 檢測環境變量
    checkEnvironmentVariables(envp);
    defaultUninitializedFallbackPaths(envp);

    // 如果設置了DYLD_PRINT_OPTS則調用printOptions()打印參數
    if ( sEnv.DYLD_PRINT_OPTS )
        printOptions(argv);
    // 如果設置了DYLD_PRINT_ENV則調用printEnvironmentVariables()打印環境變量
    if ( sEnv.DYLD_PRINT_ENV ) 
        printEnvironmentVariables(envp);
    // 獲取當前程序架構
    getHostInfo(mainExecutableMH, mainExecutableSlide);
    //-------------第一步結束-------------
    
    // load shared cache
    // 第二步,加載共享緩存
    // 檢查共享緩存是否開啟,iOS必須開啟
    checkSharedRegionDisable((mach_header*)mainExecutableMH);
    if ( gLinkContext.sharedRegionMode != ImageLoader::kDontUseSharedRegion ) {
        mapSharedCache();
    }
    ...

    try {
        // add dyld itself to UUID list
        addDyldImageToUUIDList();

        // instantiate ImageLoader for main executable
        // 第三步 實例化主程序
        sMainExecutable = instantiateFromLoadedImage(mainExecutableMH, mainExecutableSlide, sExecPath);
        gLinkContext.mainExecutable = sMainExecutable;
        gLinkContext.mainExecutableCodeSigned = hasCodeSignatureLoadCommand(mainExecutableMH);

        // Now that shared cache is loaded, setup an versioned dylib overrides
    #if SUPPORT_VERSIONED_PATHS
        checkVersionedPaths();
    #endif


        // dyld_all_image_infos image list does not contain dyld
        // add it as dyldPath field in dyld_all_image_infos
        // for simulator, dyld_sim is in image list, need host dyld added
#if TARGET_IPHONE_SIMULATOR
        // get path of host dyld from table of syscall vectors in host dyld
        void* addressInDyld = gSyscallHelpers;
#else
        // get path of dyld itself
        void*  addressInDyld = (void*)&__dso_handle;
#endif
        char dyldPathBuffer[MAXPATHLEN+1];
        int len = proc_regionfilename(getpid(), (uint64_t)(long)addressInDyld, dyldPathBuffer, MAXPATHLEN);
        if ( len > 0 ) {
            dyldPathBuffer[len] = '\0'; // proc_regionfilename() does not zero terminate returned string
            if ( strcmp(dyldPathBuffer, gProcessInfo->dyldPath) != 0 )
                gProcessInfo->dyldPath = strdup(dyldPathBuffer);
        }

        // load any inserted libraries
        // 第四步 加載插入的動態庫
        if  ( sEnv.DYLD_INSERT_LIBRARIES != NULL ) {
            for (const char* const* lib = sEnv.DYLD_INSERT_LIBRARIES; *lib != NULL; ++lib)
                loadInsertedDylib(*lib);
        }
        // record count of inserted libraries so that a flat search will look at 
        // inserted libraries, then main, then others.
        // 記錄插入的動態庫數量
        sInsertedDylibCount = sAllImages.size()-1;

        // link main executable
        // 第五步 鏈接主程序
        gLinkContext.linkingMainExecutable = true;
#if SUPPORT_ACCELERATE_TABLES
        if ( mainExcutableAlreadyRebased ) {
            // previous link() on main executable has already adjusted its internal pointers for ASLR
            // work around that by rebasing by inverse amount
            sMainExecutable->rebase(gLinkContext, -mainExecutableSlide);
        }
#endif
        link(sMainExecutable, sEnv.DYLD_BIND_AT_LAUNCH, true, ImageLoader::RPathChain(NULL, NULL), -1);
        sMainExecutable->setNeverUnloadRecursive();
        if ( sMainExecutable->forceFlat() ) {
            gLinkContext.bindFlat = true;
            gLinkContext.prebindUsage = ImageLoader::kUseNoPrebinding;
        }

        // link any inserted libraries
        // do this after linking main executable so that any dylibs pulled in by inserted 
        // dylibs (e.g. libSystem) will not be in front of dylibs the program uses
        // 第六步 鏈接插入的動態庫
        if ( sInsertedDylibCount > 0 ) {
            for(unsigned int i=0; i < sInsertedDylibCount; ++i) {
                ImageLoader* image = sAllImages[i+1];
                link(image, sEnv.DYLD_BIND_AT_LAUNCH, true, ImageLoader::RPathChain(NULL, NULL), -1);
                image->setNeverUnloadRecursive();
            }
            // only INSERTED libraries can interpose
            // register interposing info after all inserted libraries are bound so chaining works
            for(unsigned int i=0; i < sInsertedDylibCount; ++i) {
                ImageLoader* image = sAllImages[i+1];
                image->registerInterposing();
            }
        }

        // <rdar://problem/19315404> dyld should support interposition even without DYLD_INSERT_LIBRARIES
        for (long i=sInsertedDylibCount+1; i < sAllImages.size(); ++i) {
            ImageLoader* image = sAllImages[i];
            if ( image->inSharedCache() )
                continue;
            image->registerInterposing();
        }
        ...

        // apply interposing to initial set of images
        for(int i=0; i < sImageRoots.size(); ++i) {
            sImageRoots[i]->applyInterposing(gLinkContext);
        }
        gLinkContext.linkingMainExecutable = false;
        
        // <rdar://problem/12186933> do weak binding only after all inserted images linked
        // 第七步 執行弱符號綁定
        sMainExecutable->weakBind(gLinkContext);

        // If cache has branch island dylibs, tell debugger about them
        if ( (sSharedCacheLoadInfo.loadAddress != NULL) && (sSharedCacheLoadInfo.loadAddress->header.mappingOffset >= 0x78) && (sSharedCacheLoadInfo.loadAddress->header.branchPoolsOffset != 0) ) {
            uint32_t count = sSharedCacheLoadInfo.loadAddress->header.branchPoolsCount;
            dyld_image_info info[count];
            const uint64_t* poolAddress = (uint64_t*)((char*)sSharedCacheLoadInfo.loadAddress + sSharedCacheLoadInfo.loadAddress->header.branchPoolsOffset);
            // <rdar://problem/20799203> empty branch pools can be in development cache
            if ( ((mach_header*)poolAddress)->magic == sMainExecutableMachHeader->magic ) {
                for (int poolIndex=0; poolIndex < count; ++poolIndex) {
                    uint64_t poolAddr = poolAddress[poolIndex] + sSharedCacheLoadInfo.slide;
                    info[poolIndex].imageLoadAddress = (mach_header*)(long)poolAddr;
                    info[poolIndex].imageFilePath = "dyld_shared_cache_branch_islands";
                    info[poolIndex].imageFileModDate = 0;
                }
                // add to all_images list
                addImagesToAllImages(count, info);
                // tell gdb about new branch island images
                gProcessInfo->notification(dyld_image_adding, count, info);
            }
        }

        CRSetCrashLogMessage("dyld: launch, running initializers");
        ...
        // run all initializers
        // 第八步 執行初始化方法
        initializeMainExecutable(); 

        // notify any montoring proccesses that this process is about to enter main()
        dyld3::kdebug_trace_dyld_signpost(DBG_DYLD_SIGNPOST_START_MAIN_DYLD2, 0, 0);
        notifyMonitoringDyldMain();

        // find entry point for main executable
        // 第九步 查找入口點並返回
        result = (uintptr_t)sMainExecutable->getThreadPC();
        if ( result != 0 ) {
            // main executable uses LC_MAIN, needs to return to glue in libdyld.dylib
            if ( (gLibSystemHelpers != NULL) && (gLibSystemHelpers->version >= 9) )
                *startGlue = (uintptr_t)gLibSystemHelpers->startGlueToCallExit;
            else
                halt("libdyld.dylib support not present for LC_MAIN");
        }
        else {
            // main executable uses LC_UNIXTHREAD, dyld needs to let "start" in program set up for main()
            result = (uintptr_t)sMainExecutable->getMain();
            *startGlue = 0;
        }
    }
    catch(const char* message) {
        syncAllImages();
        halt(message);
    }
    catch(...) {
        dyld::log("dyld: launch failed\n");
    }
    ...
    
    return result;
}

View Code

摺疊開dyld main函數,步驟總結如下

對待dyld的講述,是非常不易的,因為本身過程是比較複雜的,上面僅僅是自身的抽出來的。下面再畫一張流程圖,幫助大家理解。


四、總結

MachO文件對於逆向開發是非常重要的,通過本次講解,希望對大家理解逆向開發有所幫助,也希望大家真正可以提高技術,應對iOS市場的大環境,下一篇我們將講述Hook原理–逆向開發。謝謝!!!


本站聲明:網站內容來源於博客園,如有侵權,請聯繫我們,我們將及時處理【其他文章推薦】

※帶您來了解什麼是 USB CONNECTOR  ?

※自行創業 缺乏曝光? 下一步"網站設計"幫您第一時間規劃公司的門面形象

※如何讓商品強力曝光呢? 網頁設計公司幫您建置最吸引人的網站,提高曝光率!!

※綠能、環保無空污,成為電動車最新代名詞,目前市場使用率逐漸普及化

※廣告預算用在刀口上,網站設計公司幫您達到更多曝光效益

分類
發燒車訊

推薦算法之用矩陣分解做協調過濾——LFM模型

隱語義模型(Latent factor model,以下簡稱LFM),是基於矩陣分解的推薦算法,在其基本算法上引入L2正則的FunkSVD算法在推薦系統領域更是廣泛使用,在Spark上也有其實現。本文將對 LFM原理進行詳細闡述,給出其基本算法原理。此外,還將介紹使得隱語義模型聲名大噪的算法FunkSVD和在其基礎上改進較為成功的BiasSVD。最後,對LFM進行一個較為全面的總結。

1. 矩陣分解應用於推薦算法要解決的問題

在推薦系統中,我們經常可能面臨的場景是:現有大量用戶和物品,以及少部分用戶對少部分物品的評分,我們需要使用現有的用戶對少部分物品的評分去推測用戶對物品集中其他物品的可能的評分,從而將預測中評分高的物品推薦給用戶。例如下面的用戶物品評分表:

用戶\物品 物品 1 物品 2 物品 3 物品 4 物品 5
用戶 1 3 2
用戶 2 1 2 6
用戶 3 3 4 6
用戶 4 1 2 5
用戶 5 4 2 3

對於每個用戶,我們希望較準確的預測出其對未評分物品的評分。將m個用戶和n個物品的評分看做一個矩陣M,從而將矩陣分解應用到該場景,即可解決這一問題。而本文,將關注於矩陣分解用於到推薦的方法之一,即LFM算法的解決方案。

2. LFM

LFM算法的核心思想是通過隱含特徵(Latent factor)聯繫用戶和物品,該算法最早在文本挖掘領域中被提出用於找到文本的隱含語義,相關名詞還有LDATopic Model等。

2.1 如何表示用戶的偏好和物品(item)屬性?

在被問到這個問題時,針對MovieLens(電影評分)數據集,你可能會說用戶是否喜歡動作片,物品所屬電影類型去回答。但用戶對其他類型的電影的偏好程度呢?物品在其它類型所佔的權重又是多少呢?就算針對現有的電影類型去表徵用戶偏好和物品,那麼能否能夠完全的表示出用戶的偏好和物品屬性呢?答案是不能,比如用戶喜歡看成龍的電影這個偏好沒法表示出來,電影由誰導演,主演是誰沒法表示。但你要問我用哪些屬性去表徵呢?這個誰也無法給出一個很好的答案,粒度很難控制。

2.2 LFM來救場

隱語義模型較好的解決了該問題,它從數據出發,通過基於用戶行為統計的自動聚類,可指定出表徵用戶偏好和物品的向量維度,最終得到用戶的偏好向量以及物品的表徵向量。LFM通過以下公式計算用戶u對物品i的偏好:
\[ preference(u, i)=p^T_u q_i=\sum_f^F{p_{u,k}q_{i,k}} \]
這個公式,\(p_{u,k}\)度量了用戶u的偏好和第f個隱類的關係,\(q_{i,k}\)度量了物品i和第f個隱類的關係。

那麼現在,我們期望用戶的評分矩陣M這樣分解:
\[ M_{m*n}=P^T_{m*k}Q_{k*n} \]
那麼,我們如何將矩陣分解呢?這裏採用了線性回歸的思想,即盡可能的讓用戶的評分和我們預測的評分的殘差盡可能小,也就是說,可以用均方差作為損失函數來尋找最終的PQ。考慮所有的用戶和樣本的組合,我們期望的最小化損失函數為:
\[ \sum_{i,j}{(m_{ij}-p_i^Tq_j)^2} \]
只要我們能夠最小化上面的式子,並求出極值所對應的\(p_i\)\(q_j\),則我們最終可以得到矩陣PQ,那麼對於任意矩陣M任意一個空白評分的位置,我們就可以通過\(p^T_i q_j\)計算預測評分。

2.3 FunkSVD用於推薦

上面是隱語義模型LFM的基本原理,但在實際業務中,為防止過擬合,我們常常會加入一個L2的正則化項,這也就誕生了我們的FunkSVD算法。其優化目標函數\(J(p,q)\)定義為:
\[ \underbrace{argmin}_{p_i,q_j}\sum_{i,j}{(m_{ij}-p^T_iq_j)^2+\lambda({\Arrowvert{p_i}\Arrowvert}^2_2+{\Arrowvert{q_i}\Arrowvert}^2_2)} \]
其中λ為正則化係數,需要調參。對於這個優化問題,我們一般通過梯度下降法來進行優化得到結果。

將上式分別對\(p_i\)\(q_j\)求導我們得到:
\[ \frac{\partial{J}}{\partial{p_i}}=-2(m_{ij}-p^T_iq_j)q_j+2\lambda{p_i} \]

\[ \frac{\partial{J}}{\partial{q_j}}=-2(m_{ij}-p^T_iq_j)p_i+2\lambda{q_j} \]

則梯度下降中迭代公式為:
\[ p_i = p_i +\alpha((m_{ij}-p^T_iq_j)q_j-\lambda{p_i}) \]

\[ q_j = q_j+\alpha((m_{ij}-p^T_iq_j)p_i-\lambda{q_j}) \]

通過迭代我們最終可以得到PQ,進而用於推薦。

為讀者進一步理解,筆者實現了基於MovieLens數據集實現了該方法。代碼詳見github:

2.4 BiasSVD用於推薦

BiasSVDFunkSVD較為成功的改進版算法。BiasSVD假設評分系統包括三部分的偏置因素:一些和用戶物品無關的評分因素。用戶有一些和物品無關的評分因素,稱為用戶偏置項。而物品也有一些和用戶無關的評分因素,稱為物品偏置項。這很好理解,對於樂觀的用戶來說,它的評分行為普遍偏高,而對批判性用戶來說,他的評分記錄普遍偏低,即使他們對同一物品的評分相同,但是他們對該物品的喜好程度卻並不一樣。同理,對物品來說,以電影為例,受大眾歡迎的電影得到的評分普遍偏高,而一些爛片的評分普遍偏低,這些因素都是獨立於用戶或產品的因素,而和用戶對產品的的喜好無關。

假設評分系統平均分為μ,第i個用戶的用戶偏置項為\(b_i\),而第j個物品的物品偏置項為\(b_j\),則加入了偏置項以後的優化目標函數\(J(p_i,q_j)\)是這樣的:
\[ \underbrace{argmin}_{p_i,q_j}\sum_{i,j}{(m_{ij}-p^T_iq_j-u-b_i-b_j)^2+\lambda({\Arrowvert{p_i}\Arrowvert}^2_2+{\Arrowvert{q_i}\Arrowvert}^2_2+{\Arrowvert{b_i}\Arrowvert}^2_2+{\Arrowvert{b_j}\Arrowvert}^2_2)} \]
這個優化目標也可以採用梯度下降法求解。和FunkSVD不同的是,此時我們多了兩個偏執項\(b_i\)\(b_j\)\(p_i\)\(q_j\)的迭代公式和FunkSVD類似,只是每一步的梯度導數稍有不同而已。\(b_i\)\(b_j\)一般可以初始設置為0,然後參与迭代。迭代公式為:
\[ p_i = p_i +\alpha((m_{ij}-p^T_iq_j-u-b_i-b_j)q_j-\lambda{p_i}) \]

\[ q_j = q_j+\alpha((m_{ij}-p^T_iq_j-u-b_i-b_j)p_i-\lambda{q_j}) \]

\[ b_i=b_i+\alpha(m_{ij}-p^T_iq_j-u-b_i-b_j-\lambda{b_i}) \]

\[ b_j=b_j+\alpha(m_{ij}-p^T_iq_j-u-b_i-b_j-\lambda{b_j}) \]

通過迭代我們最終可以得到PQ,進而用於推薦。BiasSVD增加了一些額外因素的考慮,因此在某些場景會比FunkSVD表現好。

為讀者進一步理解,筆者實現了基於MovieLens數據集實現了該方法。代碼詳見github

小結

LFM 是一種基於機器學習的方法,具有比較好的理論基礎,通過優化一個設定的指標建立最優的模型。它實質上是矩陣分解應用到推薦的方法,其中FunkSVD更是將矩陣分解用於推薦方法推到了新的高度,在實際應用中使用非常廣泛。當然矩陣分解方法也在不停的進步,目前矩陣分解推薦算法中分解機方法(factorization machine, FM)已成為一個趨勢。

對於矩陣分解用於推薦方法本身來說,它容易編程實現,實現複雜度低,預測效果也好,同時還能保持擴展性。這些都是其寶貴的優點。但是LFM 無法給出很好的推薦解釋,它計算出的隱類雖然在語義上確實代表了一類興趣和物品,卻很難用自然語言描述並生成解釋展現給用戶。

LFM 在建模過程中,假設有 M 個用戶、 N 個物品、 K 條用戶對物品的行為記錄,如果是 F 個隱類,那麼它離線計算的空間複雜度是 \(O(F*(M+N))\) ,迭代 S次則時間複雜度為 \(O(K * F * S)\)。當 M(用戶數量)和 N(物品數量)很大時LFM相對於ItemCFUserCF可以很好地節省離線計算的內存,在時間複雜度由於LFM會多次迭代上所以和ItemCFUserCF沒有質的差別。

同時,遺憾的是,LFM 無法進行在線實時推薦,即當用戶有了新的行為後,他的推薦列表不會發生變化。而從 LFM的預測公式可以看到, LFM 在給用戶生成推薦列表時,需要計算用戶對所有物品的興趣權重,然後排名,返回權重最大的 N 個物品。那麼,在物品數很多時,這一過程的時間複雜度非常高,可達 \(O(M*N*F)\) 。因此, LFM 不太適合用於物品數非常龐大的系統,如果要用,我們也需要一個比較快的算法給用戶先計算一個比較小的候選列表,然後再用LFM重新排名。另一方面,LFM 在生成一個用戶推薦列表時速度太慢,因此不能在線實時計算,而需要離線將所有用戶的推薦結果事先計算好存儲在數據庫中。

參考:

  • 推薦系統實戰—項亮

(歡迎轉載,轉載請註明出處。歡迎溝通交流: losstie@outlook.com)

本站聲明:網站內容來源於博客園,如有侵權,請聯繫我們,我們將及時處理【其他文章推薦】

網頁設計公司推薦更多不同的設計風格,搶佔消費者視覺第一線

※廣告預算用在刀口上,網站設計公司幫您達到更多曝光效益

※自行創業 缺乏曝光? 下一步"網站設計"幫您第一時間規劃公司的門面形象

分類
發燒車訊

Docker基礎與實戰,看這一篇就夠了

docker 基礎

什麼是Docker

Docker 使用 Google 公司推出的 Go 語言 進行開發實現,基於 Linux 內核的 cgroupnamespace,以及 AUFS 類的 Union FS 等技術,對進程進行封裝隔離,屬於 操作系統層面的虛擬化技術。由於隔離的進程獨立於宿主和其它的隔離的進程,因此也稱其為容器。

Docker 在容器的基礎上,進行了進一步的封裝,從文件系統、網絡互聯到進程隔離等等,極大的簡化了容器的創建和維護。使得 Docker 技術比虛擬機技術更為輕便、快捷。

記住最重要的一點,Dokcer實際是宿主機的一個普通的進程,這也是Dokcer與傳統虛擬化技術的最大不同。

為什麼要使用Docker

使用Docker最重要的一點就是Docker能保證運行環境的一致性,不會出現開發、測試、生產由於環境配置不一致導致的各種問題,一次配置多次運行。使用Docker,可更快地打包、測試以及部署應用程序,並可減少從編寫到部署運行代碼的周期。

docker 安裝

  • Docker 要求 CentOS 系統的內核版本高於 3.10 ,查看本頁面的前提條件來驗證你的CentOS 版本是否支持 Docker 。
    uname -r

  • 更新yum,升級到最新版本
    yum update

  • 卸載老版本的docker(若有)
    yum remove docker docker-common docker-selinux docker-engine
    執行該命令只會卸載Docker本身,而不會刪除Docker存儲的文件,例如鏡像、容器、卷以及網絡文件等。這些文件保存在/var/lib/docker 目錄中,需要手動刪除。

  • 查看yum倉庫,查看是否有docker
    ll /etc/yum.repos.d/

    如果用的廠商的服務器(阿里雲、騰訊雲)一般都會有docker倉庫,如果用的是虛擬機或者公司的服務器基本會沒有。

  • 安裝軟件包, yum-util 提供yum-config-manager功能,另外兩個是devicemapper驅動依賴的
    yum install -y yum-utils device-mapper-persistent-data lvm2

  • 安裝倉庫
    yum-config-manager --add-repo https://download.docker.com/linux/centos/docker-ce.repo

  • 查看docker版本
    yum list docker-ce --showduplicates | sort -r

  • 安裝docker
    yum install docker-ce
    以上語句是是安裝最新版本的Docker,你也可以通過yum install docker-ce-<VERSION> 安裝指定版本

  • 啟動docker
    systemctl start docker

  • 驗證安裝是否正確
    dokcer run hello-world

docker 重要命令

鏡像相關

  • 搜索鏡像docker search
    docker search nginx Docker就會在Docker Hub中搜索含有“nginx”這個關鍵詞的鏡像倉庫

  • 下載鏡像docker pull
    docker pull nginx Docker就會在Docker Hub中下載含有“nginx”最新版本的鏡像
    當然也可以使用docker pull reg.jianzh5.com/nginx:1.7.9 下載指定倉庫地址標籤的nginx鏡像

  • 列出鏡像docker images

  • 刪除鏡像docker rmi
    docker rmi hello-world刪除我們剛剛下載的hello-world鏡像

  • 構建鏡像docker build
    通過Dockerfile構建鏡像,這個我們等下再拿出來詳細說明。

容器相關

  • 新建啟動鏡像docker run
    這個命令是我們最常用的命令,主要使用以下幾個選項
    ① -d選項:表示後台運行
    ② -P選項(大寫):隨機端口映射
    ③ -p選項(小寫):指定端口映射,前面是宿主機端口後面是容器端口,如docker run nginx -p 8080:80,將容器的80端口映射到宿主機的8080端口,然後使用localhost:8080就可以查看容器中nginx的歡迎頁了
    ④ -v選項:掛載宿主機目錄,前面是宿主機目錄,後面是容器目錄,如docker run -d -p 80:80 -v /dockerData/nginx/conf/nginx.conf:/etc/nginx/nginx.conf nginx 掛載宿主機的/dockerData/nginx/conf/nginx.conf的文件,這樣就可以在宿主機對nginx進行參數配置了,注意目錄需要用絕對路徑,不要使用相對路徑,如果宿主機目錄不存在則會自動創建。
    ⑤–rm : 停止容器後會直接刪除容器,這個參數在測試是很有用,如docker run -d -p 80:80 --rm nginx
    ⑥–name : 給容器起個名字,否則會出現一長串的自定義名稱如 docker run -name niginx -d -p 80:80 - nginx

  • 列出容器 docker ps
    這個命令可以列出當前運行的容器,使用-a參數后列出所有的容器(包括已停止的)

  • 停止容器docker stop
    docker stop 5d034c6ea010 後面跟的是容器ID,也可以使用容器名稱

  • 啟動停止的容器docker start
    docker run是新建容器並啟動,docker start 是啟動停止的容器,如docker start 5d034c6ea010

  • 重啟容器docker restart
    此命令執行的過程實際是先執行docker stop,然後再執行docker start,如docker restart 5d034c6ea010

  • 進入容器docker exec -it 容器id /bin/bash
    docker exec -it 5d034c6ea010 /bin/bash,就相當於進入了容器本身的操作系統

  • 刪除容器 docker rm
    docker rm 5d034c6ea010 後面跟的是容器ID,刪除容器之前需要先停止容器運行

  • 數據拷貝docker cp
    此命令用於容器與宿主機之間進行數據拷貝,如 docker cp 5d034c6ea010: /etc/nginx/nginx.conf /dockerData/nginx/conf/nginx.conf 將容器的目錄文件拷貝到宿主機指定位置,容器ID可以替換成容器名。

命令實戰

如果我們需要一個nginx容器,並且需要在宿主機上直接修改nginx的配置文件、默認主頁,在宿主機可以實時看到容器nginx的日誌。我們可以按照如下的方式一步一步完成。

  • 使用–rm參數啟動容器,方便刪除
    docker run -d -p 8081:80 --name nginx --rm nginx

  • 進入容器,查看容器中配置文件、項目文件、日誌文件的目錄地址
    docker exec -it 9123b67e428e /bin/bash

  • 導出容器的配置文件
    docker cp nginx:/etc/nginx/nginx.conf /dockerData/nginx/conf/nginx.conf導出配置文件 nginx.conf
    docker cp nginx:/etc/nginx/conf.d /dockerData/nginx/conf/conf.d導出配置目錄 conf.d

  • 停止容器docker stop 9123b67e428e,由於加了–rm參數,容器會自動刪除

  • 再以如下命令啟動容器,完成目錄掛載
    shell docker run -d -p 8081:80 --name nginx \ -v /dockerData/nginx/conf/nginx.conf:/etc/nginx/nginx.conf \ -v /dockerData/nginx/conf/conf.d:/etc/nginx/conf.d \ -v /dockerData/nginx/www:/usr/share/nginx/html \ -v /dockerData/nginx/logs:/var/log/nginx nginx
  • 訪問服務器地址http://192.168.136.129:8081/

    訪問報錯,這時候就進入宿主機的日誌目錄/dockerData/nginx/logs查看日誌
    2019/11/23 10:08:11 [error] 6#6: *1 directory index of “/usr/share/nginx/html/” is forbidden, client: 192.168.136.1, server: localhost, request: “GET / HTTP/1.1”, host: “192.168.136.129:8081”
    因為/usr/share/nginx/html/被掛載到了服務器上面的/dockerData/nginx/www目錄下,原來的歡迎頁面在dockerData/nginx/www是沒有的,所有就報錯了,這裏我們隨便建一個。

  • 建立默認主頁
    shell #打開項目文件 cd /dockerData/nginx/www #使用vim 創建並編輯文件 vi index.html #此時我們會進入vim界面,按 i 插入,然後輸入 <h1 align="center">Hello,Welcome to Docker World</h1> #輸入完后,按 esc,然後輸入 :wq
  • 再次訪問瀏覽器地址

Dockerfile

我們可以使用Dockfile構建一個鏡像,然後直接在docker中運行。Dockerfile文件為一個文本文件,裡面包含構建鏡像所需的所有的命令,首先我們來認識一下Dockerfile文件中幾個重要的指令。

指令詳解

  • FROM
    選擇一個基礎鏡像,然後在基礎鏡像上進行修改,比如構建一個SpringBoot項目的鏡像,就需要選擇java這個基礎鏡像,FROM需要作為Dockerfile中的第一條指令
    如:FROM openjdk:8-jdk-alpine 基礎鏡像如果可以的話最好使用alpine版本的,採用alpline版本的基礎鏡像構建出來的鏡像會小很多。

  • RUN
    RUN指令用來執行命令行命令的。它有一下兩種格式:

    • shell 格式:RUN ,就像直接在命令行中輸入的命令一樣。 RUN echo '<h1>Hello, Docker!</h1>' > /usr/share/nginx/html/index.html
    • exec 格式:RUN [“可執行文件”, “參數1”, “參數2”],這更像是函數調用中的格式。
  • CMD
    此指令就是用於指定默認的容器主進程的啟動命令的。
    CMD指令格式和RUN相似,也是兩種格式
    • shell 格式:CMD
    • exec 格式:CMD [“可執行文件”, “參數1”, “參數2″…]
    • 參數列表格式:CMD [“參數1”, “參數2″…]。在指定了 ENTRYPOINT 指令后,用 CMD 指定具體的參數。
  • ENTRYPOINT
    ENTRYPOINT 的格式和 RUN 指令格式一樣,分為 exec 格式和 shell 格式。 ENTRYPOINT 的目的和 CMD 一樣,都是在指定容器啟動程序及參數。ENTRYPOINT 在運行時也可以替代,不過比 CMD 要略顯繁瑣,需要通過 docker run 的參數 --entrypoint 來指定。
    當指定了 ENTRYPOINT 后,CMD 的含義就發生了改變,不再是直接的運行其命令,而是將 CMD 的內容作為參數傳給 ENTRYPOINT 指令,換句話說實際執行時,將變為:
    <ENTRYPOINT> "<CMD>"

  • COPY & ADD
    這2個指令都是複製文件,它將從構建上下文目錄中   的文件/目錄 複製到新的一層的鏡像內的   位置。比如: COPY demo-test.jar app.jarADD demo-test.jar app.jar
    ADD指令比 COPY高級點,可以指定一個URL地址,這樣Docker引擎會去下載這個URL的文件,如果 ADD後面是一個 tar文件的話,Dokcer引擎還會去解壓縮。
    我們在構建鏡像時盡可能使用 COPY,因為 COPY 的語義很明確,就是複製文件而已,而 ADD 則包含了更複雜的功能,其行為也不一定很清晰。

  • EXPOSE
    聲明容器運行時的端口,這隻是一個聲明,在運行時並不會因為這個聲明應用就會開啟這個端口的服務。在 Dockerfile 中寫入這樣的聲明有兩個好處,一個是幫助鏡像使用者理解這個鏡像服務的守護端口,以方便配置映射;另一個用處則是在運行時使用隨機端口映射時,也就是 docker run -P 時,會自動隨機映射 EXPOSE 的端口。
    要將 EXPOSE 和在運行時使用 -p <宿主端口>:<容器端口> 區分開來。-p,是映射宿主端口和容器端口,換句話說,就是將容器的對應端口服務公開給外界訪問,而 EXPOSE 僅僅是聲明容器打算使用什麼端口而已,並不會自動在宿主進行端口映射。

  • ENV
    這個指令很簡單,就是設置環境變量,無論是後面的其它指令,如 RUN,還是運行時的應用,都可以直接使用這裏定義的環境變量。它有如下兩種格式:
    • ENV <key> <value>
    • ENV <key1>=<value1> <key2>=<value2>...
  • VOLUME
    該指令使容器中的一個目錄具有持久化存儲的功能,該目錄可被容器本身使用,也可共享給其他容器。當容器中的應用有持久化數據的需求時可以在Dockerfile中使用該指令。如VOLUME /tmp
    這裏的 /tmp 目錄就會在運行時自動掛載為匿名卷,任何向 /tmp 中寫入的信息都不會記錄進容器存儲層,從而保證了容器存儲層的無狀態化。當然,運行時可以覆蓋這個掛載設置。比如:
    docker run -d -v mydata:/tmp xxxx

  • LABEL
    你可以為你的鏡像添加labels,用來組織鏡像,記錄版本描述,或者其他原因,對應每個label,增加以LABEL開頭的行,和一個或者多個鍵值對。如下所示:
    LABEL version="1.0" LABEL description="test"

Dockerfile實戰

我們以一個簡單的SpringBoot項目為例構建基於SpringBoot應用的鏡像。
功能很簡單,只是對外提供了一個say接口,在進入這個方法的時候打印出一行日誌,並將日誌寫入日誌文件。

@SpringBootApplication
@RestController
@Log4j2
public class DockerApplication {

    public static void main(String[] args) {
        SpringApplication.run(DockerApplication.class, args);
    }

    @GetMapping("/say")
    public String say(){
        log.info("get say request...");
        return "Hello,Java日知錄";
    }
    
}

我們使用maven將其打包成jar文件,放入一個單獨的文件夾,然後按照下面步驟一步步構建鏡像並執行

  • 在當前文件夾建立Dockerfile文件,文件內容如下:
    properties FROM openjdk:8-jdk-alpine #將容器中的/tmp目錄作為持久化目錄 VOLUME /tmp #暴露端口 EXPOSE 8080 #複製文件 COPY docker-demo.jar app.jar #配置容器啟動后執行的命令 ENTRYPOINT ["java","-Djava.security.egd=file:/dev/./urandom","-jar","/app.jar"]
  • 使用如下命令構建鏡像
    docker built -t springboot:v1.0 .

    -t 指定鏡像的名稱及版本號,注意後面需要以 . 結尾。

  • 查看鏡像文件

  • 運行構建的鏡像
    docker run -v /app/docker/logs:/logs -p 8080:8080 --rm --name springboot springboot:v1.0

  • 瀏覽器訪問http://192.168.136.129:8080/say

  • 在宿主機上實時查看日誌
    tail -100f /app/docker/logs/docker-demo-info.log

    請關注個人公眾號:JAVA日知錄

本站聲明:網站內容來源於博客園,如有侵權,請聯繫我們,我們將及時處理【其他文章推薦】

※帶您來了解什麼是 USB CONNECTOR  ?

※自行創業 缺乏曝光? 下一步"網站設計"幫您第一時間規劃公司的門面形象

※如何讓商品強力曝光呢? 網頁設計公司幫您建置最吸引人的網站,提高曝光率!!

※綠能、環保無空污,成為電動車最新代名詞,目前市場使用率逐漸普及化

※廣告預算用在刀口上,網站設計公司幫您達到更多曝光效益

分類
發燒車訊

同步鎖基本原理與實現

  為充分利用機器性能,人們發明了多線程。但同時帶來了線程安全問題,於是人們又發明了同步鎖。

  這個問題自然人人知道,但你真的了解同步鎖嗎?還是說你會用其中的上鎖與解鎖功能?

  今天我們就一起來深入看同步鎖的原理和實現吧!


一、同步鎖的職責

  同步鎖的職責可以說就一個,限制資源的使用(線程安全從屬)。

  它一般至少會包含兩個功能: 1. 給資源加鎖; 2. 給資源解鎖;另外,它一般還有 等待/通知 即 wait/notify 的功能;

  同步鎖的應用場景:多個線程同時操作一個事務必須保證正確性;一個資源只能同時由一線程訪問操作;一個資源最多只能接入k的併發訪問;保證訪問的順序性;

  同步鎖的實現方式:操作系統調度實現;應用自行實現;CAS自旋;

  同步鎖的幾個問題:

    為什麼它能保證線程安全?

    鎖等待耗CPU嗎?

    使用鎖后性能下降嚴重的原因是啥?


二、同步鎖的實現一:lock/unlock

  其實對於應用層來說,非常多就是 lock/unlock , 這也是鎖的核心。

  AQS 是java中很多鎖實現的基礎,因為它屏蔽了很多繁雜而底層的阻塞操作,為上層抽象出易用的接口。

  我們就以AQS作為跳板,先來看一下上鎖的過程。為不至於陷入具體鎖的業務邏輯中,我們先以最簡單的 CountDownLatch 看看。

    // 先看看 CountDownLatch 的基礎數據結構,可以說是不能再簡單了,就繼承了 AQS,然後簡單覆寫了幾個必要方法。
    // java.util.concurrent.CountDownLatch.Sync
    /**
     * Synchronization control For CountDownLatch.
     * Uses AQS state to represent count.
     */
    private static final class Sync extends AbstractQueuedSynchronizer {
        private static final long serialVersionUID = 4982264981922014374L;

        Sync(int count) {
            setState(count);
        }

        int getCount() {
            return getState();
        }

        protected int tryAcquireShared(int acquires) {
            // 只有一種情況會獲取鎖成功,即 state == 0 的時候
            return (getState() == 0) ? 1 : -1;
        }

        protected boolean tryReleaseShared(int releases) {
            // Decrement count; signal when transition to zero
            for (;;) {
                int c = getState();
                if (c == 0)
                    return false;
                // 原始的鎖數量是在初始化時指定的不可變的,每次釋放一個鎖標識
                int nextc = c-1;
                if (compareAndSetState(c, nextc))
                    // 只有一情況會釋放鎖成功,即本次釋放后 state == 0
                    return nextc == 0;
            }
        }
    }
    private final Sync sync;


重點1,我們看看上鎖過程,即 await() 的調用。

    public void await() throws InterruptedException {
        // 調用 AQS 的接口,由AQS實現了鎖的骨架邏輯
        sync.acquireSharedInterruptibly(1);
    }
    
    // java.util.concurrent.locks.AbstractQueuedSynchronizer#acquireSharedInterruptibly
    /**
     * Acquires in shared mode, aborting if interrupted.  Implemented
     * by first checking interrupt status, then invoking at least once
     * {@link #tryAcquireShared}, returning on success.  Otherwise the
     * thread is queued, possibly repeatedly blocking and unblocking,
     * invoking {@link #tryAcquireShared} until success or the thread
     * is interrupted.
     * @param arg the acquire argument.
     * This value is conveyed to {@link #tryAcquireShared} but is
     * otherwise uninterpreted and can represent anything
     * you like.
     * @throws InterruptedException if the current thread is interrupted
     */
    public final void acquireSharedInterruptibly(int arg)
            throws InterruptedException {
        if (Thread.interrupted())
            throw new InterruptedException();
        // 首先嘗試獲取鎖,如果成功就不用阻塞了
        // 而從上面的邏輯我們看到,獲取鎖相當之簡單,所以,獲取鎖本身並沒有太多的性能消耗喲
        // 如果獲取鎖失敗,則會進行稍後嘗試,這應該是複雜而精巧的
        if (tryAcquireShared(arg) < 0)
            doAcquireSharedInterruptibly(arg);
    }
    
    /**
     * Acquires in shared interruptible mode.
     * @param arg the acquire argument
     */
    private void doAcquireSharedInterruptibly(int arg)
        throws InterruptedException {
        // 首先將當前線程添加排隊隊尾,此處會保證線程安全,稍後我們可以看到
        final Node node = addWaiter(Node.SHARED);
        boolean failed = true;
        try {
            for (;;) {
                // 獲取其上一節點,如果上一節點是頭節點,就代表當前線程可以再次嘗試獲取鎖了
                final Node p = node.predecessor();
                if (p == head) {
                    int r = tryAcquireShared(arg);
                    if (r >= 0) {
                        setHeadAndPropagate(node, r);
                        p.next = null; // help GC
                        failed = false;
                        return;
                    }
                }
                // 先檢測是否需要阻塞,然後再進行阻塞等待,阻塞由 LockSupport 底層支持
                // 如果阻塞后,將不會主動喚醒,只會由 unlock 時,主動被通知
                // 因此,此處即是獲取鎖的最終等待點
                // 操作系統將不會再次調度到本線程,直到獲取到鎖
                if (shouldParkAfterFailedAcquire(p, node) &&
                    parkAndCheckInterrupt())
                    throw new InterruptedException();
            }
        } finally {
            if (failed)
                cancelAcquire(node);
        }
    }

    // 如此線程安全地添加當前線程到隊尾? CAS 保證
    /**
     * Creates and enqueues node for current thread and given mode.
     *
     * @param mode Node.EXCLUSIVE for exclusive, Node.SHARED for shared
     * @return the new node
     */
    private Node addWaiter(Node mode) {
        Node node = new Node(Thread.currentThread(), mode);
        // Try the fast path of enq; backup to full enq on failure
        Node pred = tail;
        if (pred != null) {
            node.prev = pred;
            if (compareAndSetTail(pred, node)) {
                pred.next = node;
                return node;
            }
        }
        enq(node);
        return node;
    }
    /**
     * Inserts node into queue, initializing if necessary. See picture above.
     * @param node the node to insert
     * @return node's predecessor
     */
    private Node enq(final Node node) {
        for (;;) {
            Node t = tail;
            if (t == null) { // Must initialize
                if (compareAndSetHead(new Node()))
                    tail = head;
            } else {
                node.prev = t;
                if (compareAndSetTail(t, node)) {
                    t.next = node;
                    return t;
                }
            }
        }
    }
    
    // 檢測是否需要進行阻塞
    /**
     * Checks and updates status for a node that failed to acquire.
     * Returns true if thread should block. This is the main signal
     * control in all acquire loops.  Requires that pred == node.prev.
     *
     * @param pred node's predecessor holding status
     * @param node the node
     * @return {@code true} if thread should block
     */
    private static boolean shouldParkAfterFailedAcquire(Node pred, Node node) {
        int ws = pred.waitStatus;
        if (ws == Node.SIGNAL)
            /*
             * This node has already set status asking a release
             * to signal it, so it can safely park.
             */
             // 只有前置節點是 SIGNAL 狀態的節點,才需要進行 阻塞等待,當然前置節點會在下一次循環中被設置好
            return true;
        if (ws > 0) {
            /*
             * Predecessor was cancelled. Skip over predecessors and
             * indicate retry.
             */
            do {
                node.prev = pred = pred.prev;
            } while (pred.waitStatus > 0);
            pred.next = node;
        } else {
            /*
             * waitStatus must be 0 or PROPAGATE.  Indicate that we
             * need a signal, but don't park yet.  Caller will need to
             * retry to make sure it cannot acquire before parking.
             */
            compareAndSetWaitStatus(pred, ws, Node.SIGNAL);
        }
        return false;
    }
    
    // park 阻塞實現
    /**
     * Convenience method to park and then check if interrupted
     *
     * @return {@code true} if interrupted
     */
    private final boolean parkAndCheckInterrupt() {
        // 將當前 AQS 實例作為鎖對象 blocker, 進行操作系統調用阻塞, 所以所有等待鎖的線程將會在同一個鎖前提下執行
        LockSupport.park(this);
        return Thread.interrupted();
    }

  如上,上鎖過程是比較簡單明了的。加入一隊列,然後由操作系統將線程調出。(那麼操作系統是如何把線程調出的呢?有興趣自行研究)


重點2. 解鎖過程,即 countDown() 調用

    public void countDown() {
        // 同樣直接調用 AQS 的接口,由AQS實現了鎖的釋放骨架邏輯
        sync.releaseShared(1);
    }
    // java.util.concurrent.locks.AbstractQueuedSynchronizer#releaseShared
    /**
     * Releases in shared mode.  Implemented by unblocking one or more
     * threads if {@link #tryReleaseShared} returns true.
     *
     * @param arg the release argument.  This value is conveyed to
     *        {@link #tryReleaseShared} but is otherwise uninterpreted
     *        and can represent anything you like.
     * @return the value returned from {@link #tryReleaseShared}
     */
    public final boolean releaseShared(int arg) {
        // 調用業務實現的釋放邏輯,如果成功,再執行底層的釋放,如隊列移除,線程通知等等
        // 在 CountDownLatch 的實現中,只有 state == 0 時才會成功,所以它只會執行一次底層釋放
        // 這也是我們認為 CountDownLatch 能夠做到多線程同時執行的效果的原因之一
        if (tryReleaseShared(arg)) {
            doReleaseShared();
            return true;
        }
        return false;
    }
    
    /**
     * Release action for shared mode -- signals successor and ensures
     * propagation. (Note: For exclusive mode, release just amounts
     * to calling unparkSuccessor of head if it needs signal.)
     */
    private void doReleaseShared() {
        /*
         * Ensure that a release propagates, even if there are other
         * in-progress acquires/releases.  This proceeds in the usual
         * way of trying to unparkSuccessor of head if it needs
         * signal. But if it does not, status is set to PROPAGATE to
         * ensure that upon release, propagation continues.
         * Additionally, we must loop in case a new node is added
         * while we are doing this. Also, unlike other uses of
         * unparkSuccessor, we need to know if CAS to reset status
         * fails, if so rechecking.
         */
        for (;;) {
            Node h = head;
            // 隊列不為空才進行釋放
            if (h != null && h != tail) {
                int ws = h.waitStatus;
                // 看過上面的 lock 邏輯,我們知道只要在阻塞狀態,一定是 Node.SIGNAL 
                if (ws == Node.SIGNAL) {
                    // 狀態改變成功,才進行後續的喚醒邏輯
                    // 因為先改變狀態成功,才算是線程安全的,再進行喚醒,否則進入下一次循環再檢查
                    if (!compareAndSetWaitStatus(h, Node.SIGNAL, 0))
                        continue;            // loop to recheck cases
                    // 將頭節點的下一節點喚醒,如有必要
                    unparkSuccessor(h);
                }
                // 這裏的 propagates, 是要傳播啥呢??
                // 為什麼只喚醒了一個線程,其他線程也可以動了?
                else if (ws == 0 &&
                         !compareAndSetWaitStatus(h, 0, Node.PROPAGATE))
                    continue;                // loop on failed CAS
            }
            if (h == head)                   // loop if head changed
                break;
        }
    }
    /**
     * Wakes up node's successor, if one exists.
     *
     * @param node the node
     */
    private void unparkSuccessor(Node node) {
        /*
         * If status is negative (i.e., possibly needing signal) try
         * to clear in anticipation of signalling.  It is OK if this
         * fails or if status is changed by waiting thread.
         */
        int ws = node.waitStatus;
        if (ws < 0)
            compareAndSetWaitStatus(node, ws, 0);

        /*
         * Thread to unpark is held in successor, which is normally
         * just the next node.  But if cancelled or apparently null,
         * traverse backwards from tail to find the actual
         * non-cancelled successor.
         */
        // 喚醒下一個節點
        // 但如果下一節點已經取消等待了,那麼就找下一個沒最近的沒被取消的線程進行喚醒
        // 喚醒只是針對一個線程的喲
        Node s = node.next;
        if (s == null || s.waitStatus > 0) {
            s = null;
            for (Node t = tail; t != null && t != node; t = t.prev)
                if (t.waitStatus <= 0)
                    s = t;
        }
        if (s != null)
            LockSupport.unpark(s.thread);
    }


重要3. 線程解鎖的傳播性?

  因為從上一節的講解中,我們看到,當用戶調用 countDown 時,僅僅是讓操作系統喚醒了 head 的下一個節點線程或者最近未取消的節點。那麼,從哪裡來的所有線程都獲取了鎖從而運行呢?

  其實是在 獲取鎖的過程中,還有一點我們未看清:

    // java.util.concurrent.locks.AbstractQueuedSynchronizer#doAcquireShared
    /**
     * Acquires in shared uninterruptible mode.
     * @param arg the acquire argument
     */
    private void doAcquireShared(int arg) {
        final Node node = addWaiter(Node.SHARED);
        boolean failed = true;
        try {
            boolean interrupted = false;
            for (;;) {
                final Node p = node.predecessor();
                if (p == head) {
                    // 當countDown被調用后,head節點被喚醒,執行
                    int r = tryAcquireShared(arg);
                    if (r >= 0) {
                        // 獲取到鎖后,設置node為下一個頭節點,並把喚醒狀態傳播下去,而這裏面肯定會做一些喚醒其他線程的操作,請看下文
                        setHeadAndPropagate(node, r);
                        p.next = null; // help GC
                        if (interrupted)
                            selfInterrupt();
                        failed = false;
                        return;
                    }
                }
                if (shouldParkAfterFailedAcquire(p, node) &&
                    parkAndCheckInterrupt())
                    interrupted = true;
            }
        } finally {
            if (failed)
                cancelAcquire(node);
        }
    }
    
    /**
     * Sets head of queue, and checks if successor may be waiting
     * in shared mode, if so propagating if either propagate > 0 or
     * PROPAGATE status was set.
     *
     * @param node the node
     * @param propagate the return value from a tryAcquireShared
     */
    private void setHeadAndPropagate(Node node, int propagate) {
        Node h = head; // Record old head for check below
        setHead(node);
        /*
         * Try to signal next queued node if:
         *   Propagation was indicated by caller,
         *     or was recorded (as h.waitStatus either before
         *     or after setHead) by a previous operation
         *     (note: this uses sign-check of waitStatus because
         *      PROPAGATE status may transition to SIGNAL.)
         * and
         *   The next node is waiting in shared mode,
         *     or we don't know, because it appears null
         *
         * The conservatism in both of these checks may cause
         * unnecessary wake-ups, but only when there are multiple
         * racing acquires/releases, so most need signals now or soon
         * anyway.
         */
        if (propagate > 0 || h == null || h.waitStatus < 0 ||
            (h = head) == null || h.waitStatus < 0) {
            // 如果有必要,則做一次喚醒下一線程的操作
            // 在 countDown() 不會觸發此操作,所以這裏只是一個內部調用傳播
            Node s = node.next;
            if (s == null || s.isShared())
                // 此處鎖釋放邏輯如上,總之,又是另一次的喚醒觸發
                doReleaseShared();
        }
    }

  到此,我們明白了它是怎麼做到一個鎖釋放,所有線程可通行的。也從根本上回答了我們猜想,所有線程同時併發運行。然而並沒有,它只是通過喚醒傳播性來依次喚醒各個等待線程的。從絕對時間性上來講,都是有先後關係的。以後可別再淺顯說是同時執行了喲。


三、 鎖的切換:wait/notify

  上面看出,針對一個lock/unlock 的過程還是很簡單的,由操作系統負責大頭,實現代碼也並不多。

  但是針對稍微有點要求的場景,就會進行條件式的操作。比如:持有某個鎖運行一段代碼,但是,運行時發現某條件不滿足,需要進行等待而不能直接結束,直到條件成立。即所謂的 wait 操作。

  乍一看,wait/notify 與 lock/unlock 很像,其實不然。區分主要是 lock/unlock 是針對整個代碼段的,而 wait/notify 則是針對某個條件的,即獲取了鎖不代表條件成立了,但是條件成立了一定要在鎖的前提下才能進行安全操作。

  那麼,是否 wait/notify 也一樣的實現簡單呢?比如java的最基礎類 Object 類就提供了 wait/notify 功能。

  我們既然想一探究竟,還是以併發包下的實現作為基礎吧,畢竟 java 才是我們的強項。

  本次,咱們以  ArrayBlockingQueue#put/take 作為基礎看下這種場景的使用先。

  ArrayBlockingQueue 的put/take 特性就是,put當隊列滿時,一直阻塞,直到有可用位置才繼續運行下一步。而take當隊列為空時一樣阻塞,直到隊列里有數據才運行下一步。這種場景使用鎖主不好搞了,因為這是一個條件判斷。put/take 如下:

    // java.util.concurrent.ArrayBlockingQueue#put
    /**
     * Inserts the specified element at the tail of this queue, waiting
     * for space to become available if the queue is full.
     *
     * @throws InterruptedException {@inheritDoc}
     * @throws NullPointerException {@inheritDoc}
     */
    public void put(E e) throws InterruptedException {
        checkNotNull(e);
        final ReentrantLock lock = this.lock;
        lock.lockInterruptibly();
        try {
            // 當隊列滿時,一直等待
            while (count == items.length)
                notFull.await();
            enqueue(e);
        } finally {
            lock.unlock();
        }
    }
    
    // java.util.concurrent.ArrayBlockingQueue#take
    public E take() throws InterruptedException {
        final ReentrantLock lock = this.lock;
        lock.lockInterruptibly();
        try {
            // 當隊列為空時一直等待
            while (count == 0)
                notEmpty.await();
            return dequeue();
        } finally {
            lock.unlock();
        }
    }

  看起來相當簡單,完全符合人類思維。只是,這裏使用的兩個變量進行控制流程 notFull,notEmpty. 這兩個變量是如何進行關聯的呢?

  在這之前,我們還需要補充下上面的例子,即 notFull.await(), notEmpty.await(); 被阻塞了,何時才能運行呢?如上代碼在各自的入隊和出隊完成之後進行通知就可以了。

    // 與 put 對應,入隊完成后,隊列自然就不為空了,通知下 notEmpty 就好了
    /**
     * Inserts element at current put position, advances, and signals.
     * Call only when holding lock.
     */
    private void enqueue(E x) {
        // assert lock.getHoldCount() == 1;
        // assert items[putIndex] == null;
        final Object[] items = this.items;
        items[putIndex] = x;
        if (++putIndex == items.length)
            putIndex = 0;
        count++;
        // 我已放入一個元素,不為空了
        notEmpty.signal();
    }
    // 與 take 對應,出隊完成后,自然就不可能是滿的了,至少一個空餘空間。
    /**
     * Extracts element at current take position, advances, and signals.
     * Call only when holding lock.
     */
    private E dequeue() {
        // assert lock.getHoldCount() == 1;
        // assert items[takeIndex] != null;
        final Object[] items = this.items;
        @SuppressWarnings("unchecked")
        E x = (E) items[takeIndex];
        items[takeIndex] = null;
        if (++takeIndex == items.length)
            takeIndex = 0;
        count--;
        if (itrs != null)
            itrs.elementDequeued();
        // 我已移除一個元素,肯定沒有滿了,你們繼續放入吧
        notFull.signal();
        return x;
    }

  是不是超級好理解。是的。不過,我們不是想看 ArrayBlockingQueue 是如何實現的,我們是要論清 wait/notify 是如何實現的。因為畢竟,他們不是一個鎖那麼簡單。

    // 三個鎖的關係,即 notEmpty, notFull 都是 ReentrantLock 的條件鎖,相當於是其子集吧
    /** Main lock guarding all access */
    final ReentrantLock lock;

    /** Condition for waiting takes */
    private final Condition notEmpty;

    /** Condition for waiting puts */
    private final Condition notFull;
    
    public ArrayBlockingQueue(int capacity, boolean fair) {
        if (capacity <= 0)
            throw new IllegalArgumentException();
        this.items = new Object[capacity];
        lock = new ReentrantLock(fair);
        notEmpty = lock.newCondition();
        notFull =  lock.newCondition();
    }
    // lock.newCondition() 是什麼鬼?它是 AQS 中實現的 ConditionObject
    // java.util.concurrent.locks.ReentrantLock#newCondition
    public Condition newCondition() {
        return sync.newCondition();
    }
        // java.util.concurrent.locks.ReentrantLock.Sync#newCondition
        final ConditionObject newCondition() {
            // AQS 中定義
            return new ConditionObject();
        }

  接下來,我們要帶着幾個疑問來看這個 Condition 的對象:

    1. 它的 wait/notify 是如何實現的?
    2. 它是如何與互相進行聯繫的?
    3. 為什麼 wait/notify 必須要在外面的lock獲取之後才能執行?
    4. 它與Object的wait/notify 有什麼相同和不同點?

  能夠回答了上面的問題,基本上對其原理與實現也就理解得差不多了。


重點1. wait/notify 是如何實現的?

  我們從上面可以看到,它是通過調用 await()/signal() 實現的,到底做事如何,且看下面。

        // java.util.concurrent.locks.AbstractQueuedSynchronizer.ConditionObject#await()
        /**
         * Implements interruptible condition wait.
         * <ol>
         * <li> If current thread is interrupted, throw InterruptedException.
         * <li> Save lock state returned by {@link #getState}.
         * <li> Invoke {@link #release} with saved state as argument,
         *      throwing IllegalMonitorStateException if it fails.
         * <li> Block until signalled or interrupted.
         * <li> Reacquire by invoking specialized version of
         *      {@link #acquire} with saved state as argument.
         * <li> If interrupted while blocked in step 4, throw InterruptedException.
         * </ol>
         */
        public final void await() throws InterruptedException {
            if (Thread.interrupted())
                throw new InterruptedException();
            // 添加當前線程到 等待線程隊列中,有 lastWaiter/firstWaiter 維護
            Node node = addConditionWaiter();
            // 釋放當前lock中持有的鎖,詳情且看下文
            int savedState = fullyRelease(node);
            // 從以下開始,將不再保證線程安全性,因為當前的鎖已經釋放,其他線程將會重新競爭鎖使用
            int interruptMode = 0;
            // 循環判定,如果當前節點不在 sync 同步隊列中,那麼就反覆阻塞自己
            // 所以判斷是否在 同步隊列上,是很重要的
            while (!isOnSyncQueue(node)) {
                // 沒有在同步隊列,阻塞
                LockSupport.park(this);
                if ((interruptMode = checkInterruptWhileWaiting(node)) != 0)
                    break;
            }
            // 當條件被滿足后,需要重新競爭鎖,詳情看下文
            // 競爭到鎖后,原樣返回到 wait 的原點,繼續執行業務邏輯
            if (acquireQueued(node, savedState) && interruptMode != THROW_IE)
                interruptMode = REINTERRUPT;
            // 下面是異常處理,忽略
            if (node.nextWaiter != null) // clean up if cancelled
                unlinkCancelledWaiters();
            if (interruptMode != 0)
                reportInterruptAfterWait(interruptMode);
        }
    /**
     * Invokes release with current state value; returns saved state.
     * Cancels node and throws exception on failure.
     * @param node the condition node for this wait
     * @return previous sync state
     */
    final int fullyRelease(Node node) {
        boolean failed = true;
        try {
            int savedState = getState();
            // 預期的,都是釋放鎖成功,如果失敗,說明當前線程並並未獲取到鎖,引發異常
            if (release(savedState)) {
                failed = false;
                return savedState;
            } else {
                throw new IllegalMonitorStateException();
            }
        } finally {
            if (failed)
                node.waitStatus = Node.CANCELLED;
        }
    }
    /**
     * Releases in exclusive mode.  Implemented by unblocking one or
     * more threads if {@link #tryRelease} returns true.
     * This method can be used to implement method {@link Lock#unlock}.
     *
     * @param arg the release argument.  This value is conveyed to
     *        {@link #tryRelease} but is otherwise uninterpreted and
     *        can represent anything you like.
     * @return the value returned from {@link #tryRelease}
     */
    public final boolean release(int arg) {
        // tryRelease 由客戶端自定義實現
        if (tryRelease(arg)) {
            Node h = head;
            if (h != null && h.waitStatus != 0)
                unparkSuccessor(h);
            return true;
        }
        return false;
    }
    
    // 如何判定當前線程是否在同步隊列中或者可以進行同步隊列?
    /**
     * Returns true if a node, always one that was initially placed on
     * a condition queue, is now waiting to reacquire on sync queue.
     * @param node the node
     * @return true if is reacquiring
     */
    final boolean isOnSyncQueue(Node node) {
        // 如果上一節點還沒有被移除,當前節點就不能被加入到同步隊列
        if (node.waitStatus == Node.CONDITION || node.prev == null)
            return false;
        // 如果當前節點的下游節點已經存在,則它自身必定已經被移到同步隊列中
        if (node.next != null) // If has successor, it must be on queue
            return true;
        /*
         * node.prev can be non-null, but not yet on queue because
         * the CAS to place it on queue can fail. So we have to
         * traverse from tail to make sure it actually made it.  It
         * will always be near the tail in calls to this method, and
         * unless the CAS failed (which is unlikely), it will be
         * there, so we hardly ever traverse much.
         */
         // 最終直接從同步隊列中查找,如果找到,則自身已經在同步隊列中
        return findNodeFromTail(node);
    }

    /**
     * Returns true if node is on sync queue by searching backwards from tail.
     * Called only when needed by isOnSyncQueue.
     * @return true if present
     */
    private boolean findNodeFromTail(Node node) {
        Node t = tail;
        for (;;) {
            if (t == node)
                return true;
            if (t == null)
                return false;
            t = t.prev;
        }
    }
    
    // 當條件被滿足后,需要重新競爭鎖,以保證外部的鎖語義,因為之前自己已經將鎖主動釋放
    // 這個鎖與 lock/unlock 時的一毛一樣,沒啥可講的
    // java.util.concurrent.locks.AbstractQueuedSynchronizer#acquireQueued
    /**
     * Acquires in exclusive uninterruptible mode for thread already in
     * queue. Used by condition wait methods as well as acquire.
     *
     * @param node the node
     * @param arg the acquire argument
     * @return {@code true} if interrupted while waiting
     */
    final boolean acquireQueued(final Node node, int arg) {
        boolean failed = true;
        try {
            boolean interrupted = false;
            for (;;) {
                final Node p = node.predecessor();
                if (p == head && tryAcquire(arg)) {
                    setHead(node);
                    p.next = null; // help GC
                    failed = false;
                    return interrupted;
                }
                if (shouldParkAfterFailedAcquire(p, node) &&
                    parkAndCheckInterrupt())
                    interrupted = true;
            }
        } finally {
            if (failed)
                cancelAcquire(node);
        }
    }

  總結一下 wait 的邏輯:

    1. 前提:自身已獲取到外部鎖;
    2. 將當前線程添加到 ConditionQueue 等待隊列中;
    3. 釋放已獲取到的鎖;
    4. 反覆檢查進入等待,直到當前節點被移動到同步隊列中;
    5. 條件滿足被喚醒,重新競爭外部鎖,成功則返回,否則繼續阻塞;(外部鎖是同一個,這也是要求兩個對象必須存在依賴關係的原因)
    6. wait前線程持有鎖,wait后線程持有鎖,沒有一點外部鎖變化;


重點2. 釐清了 wait, 接下來,我們看 signal() 通知喚醒的實現:

        // java.util.concurrent.locks.AbstractQueuedSynchronizer.ConditionObject#signal
        /**
         * Moves the longest-waiting thread, if one exists, from the
         * wait queue for this condition to the wait queue for the
         * owning lock.
         *
         * @throws IllegalMonitorStateException if {@link #isHeldExclusively}
         *         returns {@code false}
         */
        public final void signal() {
            // 只有獲取鎖的實例,才可以進行signal,否則你拿什麼去保證線程安全呢
            if (!isHeldExclusively())
                throw new IllegalMonitorStateException();
            Node first = firstWaiter;
            // 通知 firstWaiter 
            if (first != null)
                doSignal(first);
        }
        
        /**
         * Removes and transfers nodes until hit non-cancelled one or
         * null. Split out from signal in part to encourage compilers
         * to inline the case of no waiters.
         * @param first (non-null) the first node on condition queue
         */
        private void doSignal(Node first) {
            // 最多只轉移一個 節點
            do {
                if ( (firstWaiter = first.nextWaiter) == null)
                    lastWaiter = null;
                first.nextWaiter = null;
            } while (!transferForSignal(first) &&
                     (first = firstWaiter) != null);
        }
    // 將一個節點從 等待隊列 移動到 同步隊列中,即可參与下一輪競爭
    // 只有確實移動成功才會返回 true
    // 說明:當前線程是持有鎖的線程
    // java.util.concurrent.locks.AbstractQueuedSynchronizer#transferForSignal
    /**
     * Transfers a node from a condition queue onto sync queue.
     * Returns true if successful.
     * @param node the node
     * @return true if successfully transferred (else the node was
     * cancelled before signal)
     */
    final boolean transferForSignal(Node node) {
        /*
         * If cannot change waitStatus, the node has been cancelled.
         */
        if (!compareAndSetWaitStatus(node, Node.CONDITION, 0))
            return false;

        /*
         * Splice onto queue and try to set waitStatus of predecessor to
         * indicate that thread is (probably) waiting. If cancelled or
         * attempt to set waitStatus fails, wake up to resync (in which
         * case the waitStatus can be transiently and harmlessly wrong).
         */
        // 同步隊列由 head/tail 指針維護
        Node p = enq(node);
        int ws = p.waitStatus;
        // 注意,此處正常情況下並不會喚醒等待線程,僅是將隊列轉移。 
        // 因為當前線程的鎖保護區域並未完成,完成后自然會喚醒其他等待線程
        // 否則將會存在當前線程任務還未執行完成,卻被其他線程搶了先去,那接下來的任務當如何??
        if (ws > 0 || !compareAndSetWaitStatus(p, ws, Node.SIGNAL))
            LockSupport.unpark(node.thread);
        return true;
    }

  總結一下,notify 的功能原理如下:

    1. 前提:自身已獲取到外部鎖;
    2. 轉移下一個等待隊列的節點到同步隊列中;
    3. 如果遇到下一節點被取消情況,順延到再下一節點直到為空,至多轉移一個節點;
    4. 正常情況下不做線程的喚醒操作;

  所以,實現 wait/notify, 最關鍵的就是維護兩個隊列,等待隊列與同步隊列,而且都要求是在有外部鎖保證的情況下執行。

  到此,我們也能回答一個問題:為什麼wait/notify一定要在鎖模式下才能運行?

  因為wait是等待條件成立,此時必定存在競爭需要做保護,而它自身又必須釋放鎖以使外部條件可成立,且後續需要做恢復動作;而notify之後可能還有後續工作必須保障安全,notify只是鎖的一個子集。。。


四、通知所有線程的實現:notifyAll

  有時條件成立后,可以允許所有線程通行,這時就可以進行 notifyAll, 那麼如果達到通知所有的目的呢?是一起通知還是??

  以下是 AQS 中的實現:

        // java.util.concurrent.locks.AbstractQueuedSynchronizer.ConditionObject#signalAll
        public final void signalAll() {
            if (!isHeldExclusively())
                throw new IllegalMonitorStateException();
            Node first = firstWaiter;
            if (first != null)
                doSignalAll(first);
        }
        /**
         * Removes and transfers all nodes.
         * @param first (non-null) the first node on condition queue
         */
        private void doSignalAll(Node first) {
            lastWaiter = firstWaiter = null;
            do {
                Node next = first.nextWaiter;
                first.nextWaiter = null;
                transferForSignal(first);
                first = next;
            } while (first != null);
        }

  可以看到,它是通過遍歷所有節點,依次轉移等待隊列到同步隊列(通知)的,原本就沒有人能同時干幾件事的!

  本文從java實現的角度去解析同步鎖的原理與實現,但並不局限於java。道理總是相通的,只是像操作系統這樣的大佬,能幹的活更純粹:比如讓cpu根本不用調度一個線程。


本站聲明:網站內容來源於博客園,如有侵權,請聯繫我們,我們將及時處理【其他文章推薦】

網頁設計公司推薦更多不同的設計風格,搶佔消費者視覺第一線

※廣告預算用在刀口上,網站設計公司幫您達到更多曝光效益

※自行創業 缺乏曝光? 下一步"網站設計"幫您第一時間規劃公司的門面形象

分類
發燒車訊

this綁定方式總結

最近在回顧js的一些基礎知識,把《你不知道的js》系列又看了一遍,this始終是重中之重,還是決定把this相關知識做一個系統的總結,也方便自己日後回顧。

this的四條綁定規則

1.默認綁定

這是最常用的函數調用類型:獨立函數調用(即函數是直接使用不帶任何修飾的函數引用進行調用的)。可以把這條規則看作是無法應用其他規則時的默認規則。
默認綁定的this在非嚴格模式下指向window,嚴格模式下指向undefined,比如下面的函數foo在非嚴格模式下:

var a = 2;
function foo(){
    var a = 3;
    console.log(this.a);
}
foo(); //2

這裏的foo()方法內的this指向了window,因此window.a = 2;

嚴格模式下,this.指向undefined,因此訪問this.a會報錯:

var a = 2;
function foo(){
    "use strict";
    var a = 3;
    console.log(this.a);
}
foo(); //Uncaught TypeError: Cannot read property 'a' of undefined

2.隱式綁定

如果調用位置上有上下文對象,或者說被某個對象“擁有”或者“包
含”,則使用隱式綁定。

function foo() {
    console.log( this.a );
}
var obj = {
    a: 2,
    foo: foo
};
obj.foo(); // 2

上例中的foo是通過obj.foo()的方式調用的,調用位置會使用obj上下文來引用函數,因此foo中的this指向了obj。
另外foo是當做引用被加入到obj中的,但是無論是直接在obj 中定義還是先定義再添加為引用屬性,foo嚴格上來說都不屬於obj,因此上述定義裏面的“擁有”與“包含”加上了引號,這樣說是為了方便理解。
常見的隱式調用場景:
obj.fn();
arguments[i]();//其實就是將點的調用方式變為了[]調用
el.onClick(function(){console.log(this);//this指向el})

隱式丟失

先來看一段代碼:

function foo() {
    console.log( this.a );
}
var obj = {
    a: 2,
    foo: foo
};
var bar = obj.foo; // 函數別名!
var a = "global"; // a 是全局對象的屬性
bar(); // "global"

上述代碼其實只用看調用的方式:bar(),這其實是一個不帶任何修飾的函數調用,因此應用了默認綁定。
還有一種參數傳遞的方式也會發生隱式丟失,原理其實跟上述例子一樣:

function foo() {
    console.log( this.a );
}
function doFoo(fn) {
    // fn 其實引用的是foo
    fn(); // <-- 調用位置!
}
var obj = {
    a: 2,
    foo: foo
};
var a = "global"; // a 是全局對象的屬性
doFoo( obj.foo ); // "global"

显示綁定

使用call,apply和bind方法可以指定綁定函數的this的值,這種綁定方法叫显示綁定。

function foo() {
    console.log( this.a );
}
var obj = {
    a:2
};
foo.call( obj ); // 2

通過foo.call(obj),我們可以在調用foo 時強制把它的this 綁定到obj 上

new綁定

new操作符可以基於一個“構造函數”新創建一個對象實例,new的實例化過程如下:

  1. 創建(或者說構造)一個全新的對象。
  2. 這個新對象會被執行[[ 原型]] 連接。
  3. 這個新對象會綁定到函數調用的this。
  4. 如果函數沒有返回其他對象,那麼new 表達式中的函數調用會自動返回這個新對象。
    明確了new的實例化過程后,思考如下代碼:
function foo(a) {
    this.a = a;
}
var bar = new foo(2);
console.log( bar.a ); // 2

new foo(2)后新創建了個實例對象bar,然後把這個新對象bar綁定到了foo函數中的this,因此執行this.a = a后其實是把a賦給了bar.a

優先級

一般情況下this的綁定會根據上述四條綁定規則來,那麼他們同時出現時,該以怎樣的順序來判斷this的指向?下面是具體的規則:

  1. 函數是否在new 中調用(new 綁定)?如果是的話this 綁定的是新創建的對象( var bar = new foo() )。
  2. 函數是否通過call、apply(顯式綁定)或者硬綁定調用?如果是的話,this 綁定的是指定的對象( var bar = foo.call(obj2) )。
  3. 函數是否在某個上下文對象中調用(隱式綁定)?如果是的話,this 綁定的是那個上下文對象。( var bar = obj1.foo() )
  4. 如果都不是的話,使用默認綁定。如果在嚴格模式下,就綁定到undefined,否則綁定到全局對象。( var bar = foo() )

綁定例外

1.使用call,appy,bind這種顯式綁定的方法,參數傳入null或者undefined作為上下文時,函數調用還是會使用默認綁定

function foo() {
    console.log( this.a );
}
var a = 2;
foo.call( null ); // 2

什麼情況下需要將上下文傳為null呢?
1.使用bind函數來實現柯里化

function foo(a,b) {
    console.log(a,b);
}
// 使用 bind(..) 進行柯里化
var bar = foo.bind( null, 2 );
bar( 3 ); // 2,3

2.使用apply(..) 來展開一個數組,併當作參數傳入一個函數

function foo(a,b) {
    console.log(a,b);
}
// 把數組展開成參數
foo.apply( null, [2, 3] ); // 2,3

其實上面兩種使用場景其實都不關心call/app/bind第一個參數的值是什麼,只是想傳個佔位值而已。
但是總是傳入null可能會出現一些難以追蹤的bug,比如說當你在使用的第三方庫中的某個函數中有this時,this會被錯誤的綁定到全局對象上,造成一些難以預料的後果(修改全局變量)

var a = 1;//全局變量
const Utils = {
    a: 2,
    changeA: function(a){
        this.a = a;
    }
}
Utils.changeA(3);
Utils.a //3
a //1
Utils.changeA.call(null,4);
Utils.a //3
a //4,修改了全局變量a!

更安全的做法:

var o = Object.create(null);
Utils.changeA.call(o,6);
a //1, 全局變量沒有修改
o.a // 6 改的是變量o

2.間接引用

function foo() {
    console.log( this.a );
}
var a = 2;
var o = { a: 3, foo: foo };
var p = { a: 4 };
o.foo(); // 3
(p.foo = o.foo)(); // 2

賦值表達式p.foo = o.foo 的返回值是目標函數的引用,因此調用位置是foo() 而不是p.foo() 或者o.foo()。根據我們之前說過的,這裡會應用默認綁定。

this詞法(箭頭函數)

上述的幾種規則適用於所有的正常函數,但不包括ES6的箭頭函數。箭頭函數不使用this的四種標準規則,而是根據外層(函數或者全局)作用域(詞法作用域)來決定this

function foo() {
// 返回一個箭頭函數
    return (a) => {
        //this 繼承自foo()
        console.log( this.a );
    };
}
var obj1 = {
    a:2
};
var obj2 = {
    a:3
};
var bar = foo.call( obj1 );
bar.call( obj2 ); // 2, 不是3 !

foo() 內部創建的箭頭函數會捕獲調用時foo() 的this。由於foo() 的this 綁定到obj1,bar(引用箭頭函數)的this 也會綁定到obj1,箭頭函數的綁定無法被修改。(new 也不行!)

幾個例子加深理解

this的理論知識講解得差不多了,來幾個例子看看自己有沒有理解全面:
1.經典面試題:以下輸出結果是什麼

var length = 10;
function fn() {
    console.log(this.length);
}
var obj = {
  length: 5,
  method: function(fn) {
    fn();
    arguments[0]();
  }
};
obj.method(fn, 1);

obj中method方法裏面調用了兩次fn。第一次是直接調用的“裸露”的fn,因此fn()中this使用默認綁定,this.length為10.第二次調用時通過arguments的方式調用的,arguments[0]其實指向的就是fn,但是是通過obj[fn]這種對象上下文的隱式綁定的,因此this指向arguments,而arguments只有一個一項(method中只有fn一個參數),因此arguments.length為1。因此打印的結果為:

10
1

2.以下輸出什麼

var obj = {
    birth: 1990,
    getAge: function () {
        var b = this.birth; // 1990
        var fn = function () {
            return new Date().getFullYear() - this.birth; // this指向window或undefined
        };
        return fn();
    }
};
obj.getAge();

答案是嚴格模式下會報錯,非嚴格模式下輸出NaN
原因也是因為在調用obj.getAge()后,getAge方法內的this使用隱式綁定。但是return fn()的時候用的是“裸露的fn”使用默認綁定,fn裏面的this指向window或者undefined。
使用箭頭函數來修正this的指向:

var obj = {
    birth: 1990,
    getAge: function () {
        var b = this.birth; // 1990
        var fn = () => new Date().getFullYear() - this.birth; // this指向obj對象
        return fn();
    }
};
obj.getAge(); // 25

使用箭頭函數后,fn中的this在他的詞法分析階段就已經確定好了(即fn定義的時候),跟調用位置無關。fn的this指向外層的作用域(即getAge中的this)
3.以下輸出為什麼是’luo’

var A = function( name ){ 
    this.name = name;
};
var B = function(){ 
    A.apply(this,arguments);
};
B.prototype.getName = function(){ 
    return this.name;
};
var b=new B('sven');  // B {name: "luo"}
console.log( b.getName() ); // 輸出:  'luo'

執行new B(‘seven’)後會返回一個新對象b,並且B函數中的this會綁定到新對象b上,B的函數體內執行A.apply(this.arguments)也就是執行b.name = name;這個時候b的值就是{name:’luo’},所以b.getName()就能輸出’luo’啦~

實際在業務使用中,邏輯會更複雜一些,但是萬變不離其宗,都按照上面寫的規則來代入就好了

本站聲明:網站內容來源於博客園,如有侵權,請聯繫我們,我們將及時處理【其他文章推薦】

※帶您來了解什麼是 USB CONNECTOR  ?

※自行創業 缺乏曝光? 下一步"網站設計"幫您第一時間規劃公司的門面形象

※如何讓商品強力曝光呢? 網頁設計公司幫您建置最吸引人的網站,提高曝光率!!

※綠能、環保無空污,成為電動車最新代名詞,目前市場使用率逐漸普及化

※廣告預算用在刀口上,網站設計公司幫您達到更多曝光效益

【其他文章推薦】

台北網頁設計公司這麼多,該如何挑選?? 網頁設計報價省錢懶人包"嚨底家"

網頁設計公司推薦更多不同的設計風格,搶佔消費者視覺第一線

※想知道購買電動車哪裡補助最多?台中電動車補助資訊懶人包彙整